Welcome! Today, we'll show you how to Add a New Trip in the Oasis Travel Platform.
1. On the left hand column under the Trips tab, click on Create. Alternatively, click on the Quick Add button towards the top right, and click Create Trip.

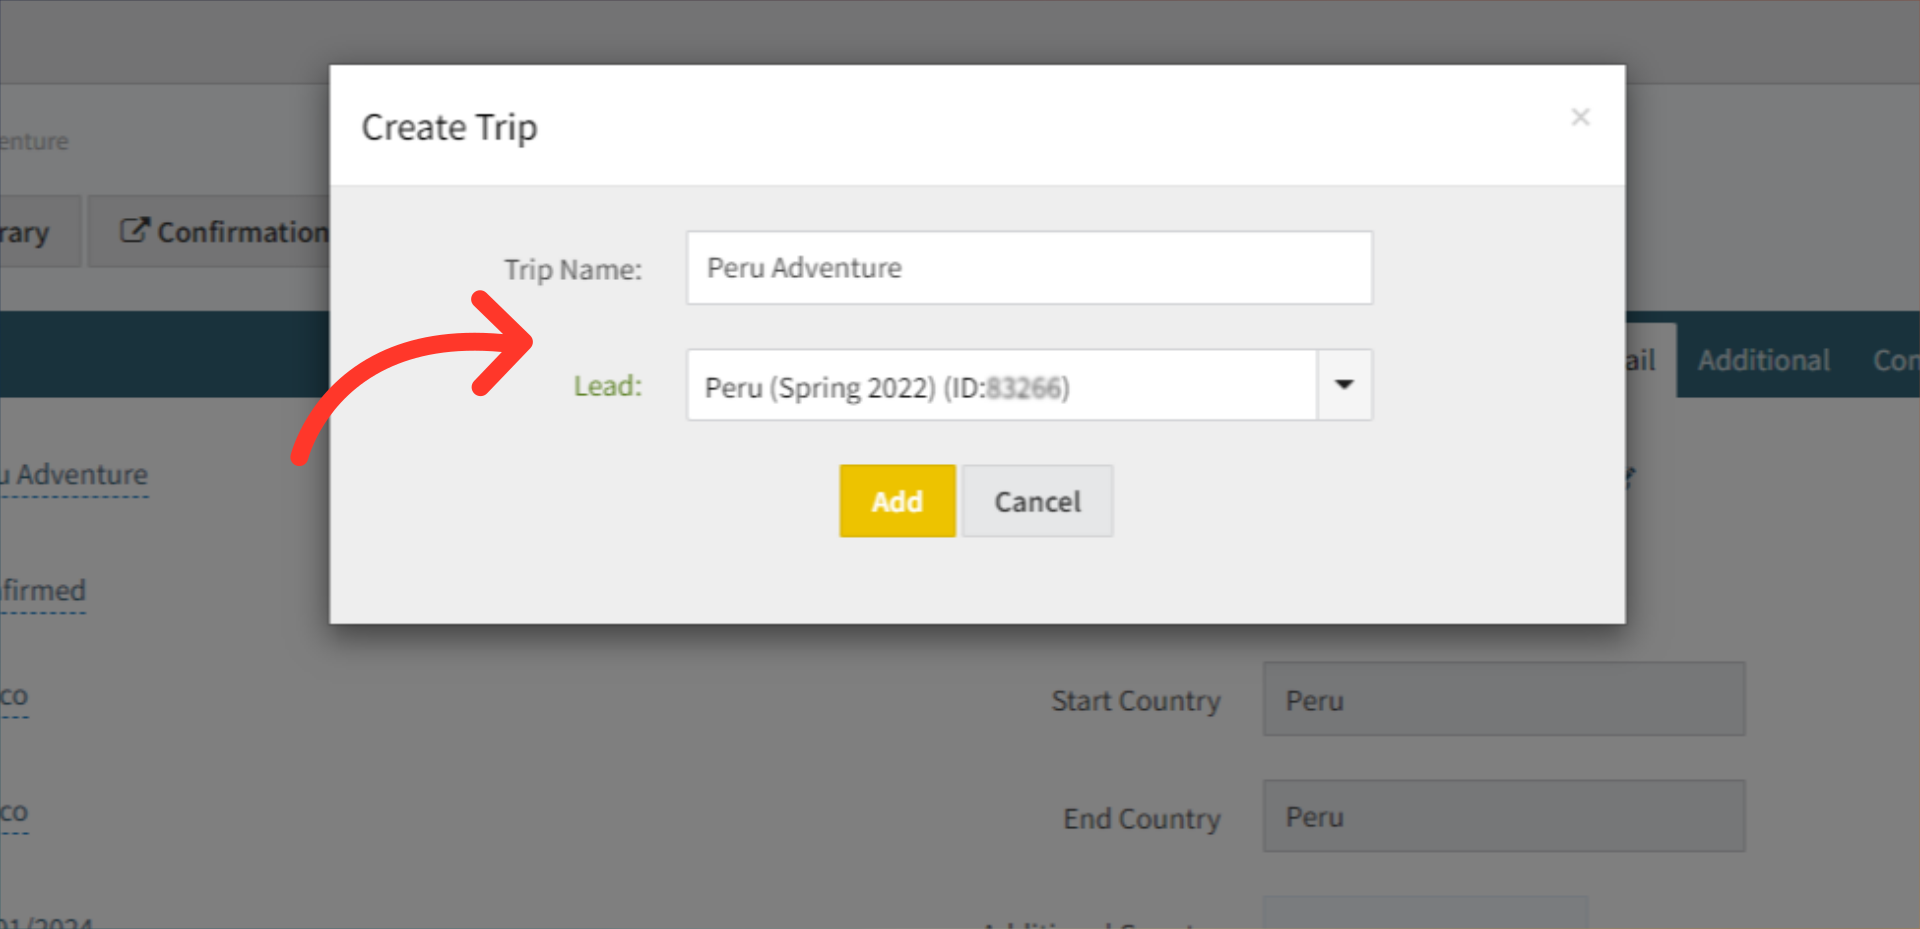
2. Enter a Trip Name and assign the Trip to a Lead Booking that should already exist. If not you'll need to create a new Lead Booking before creating a trip. Once complete, hit Add to continue.
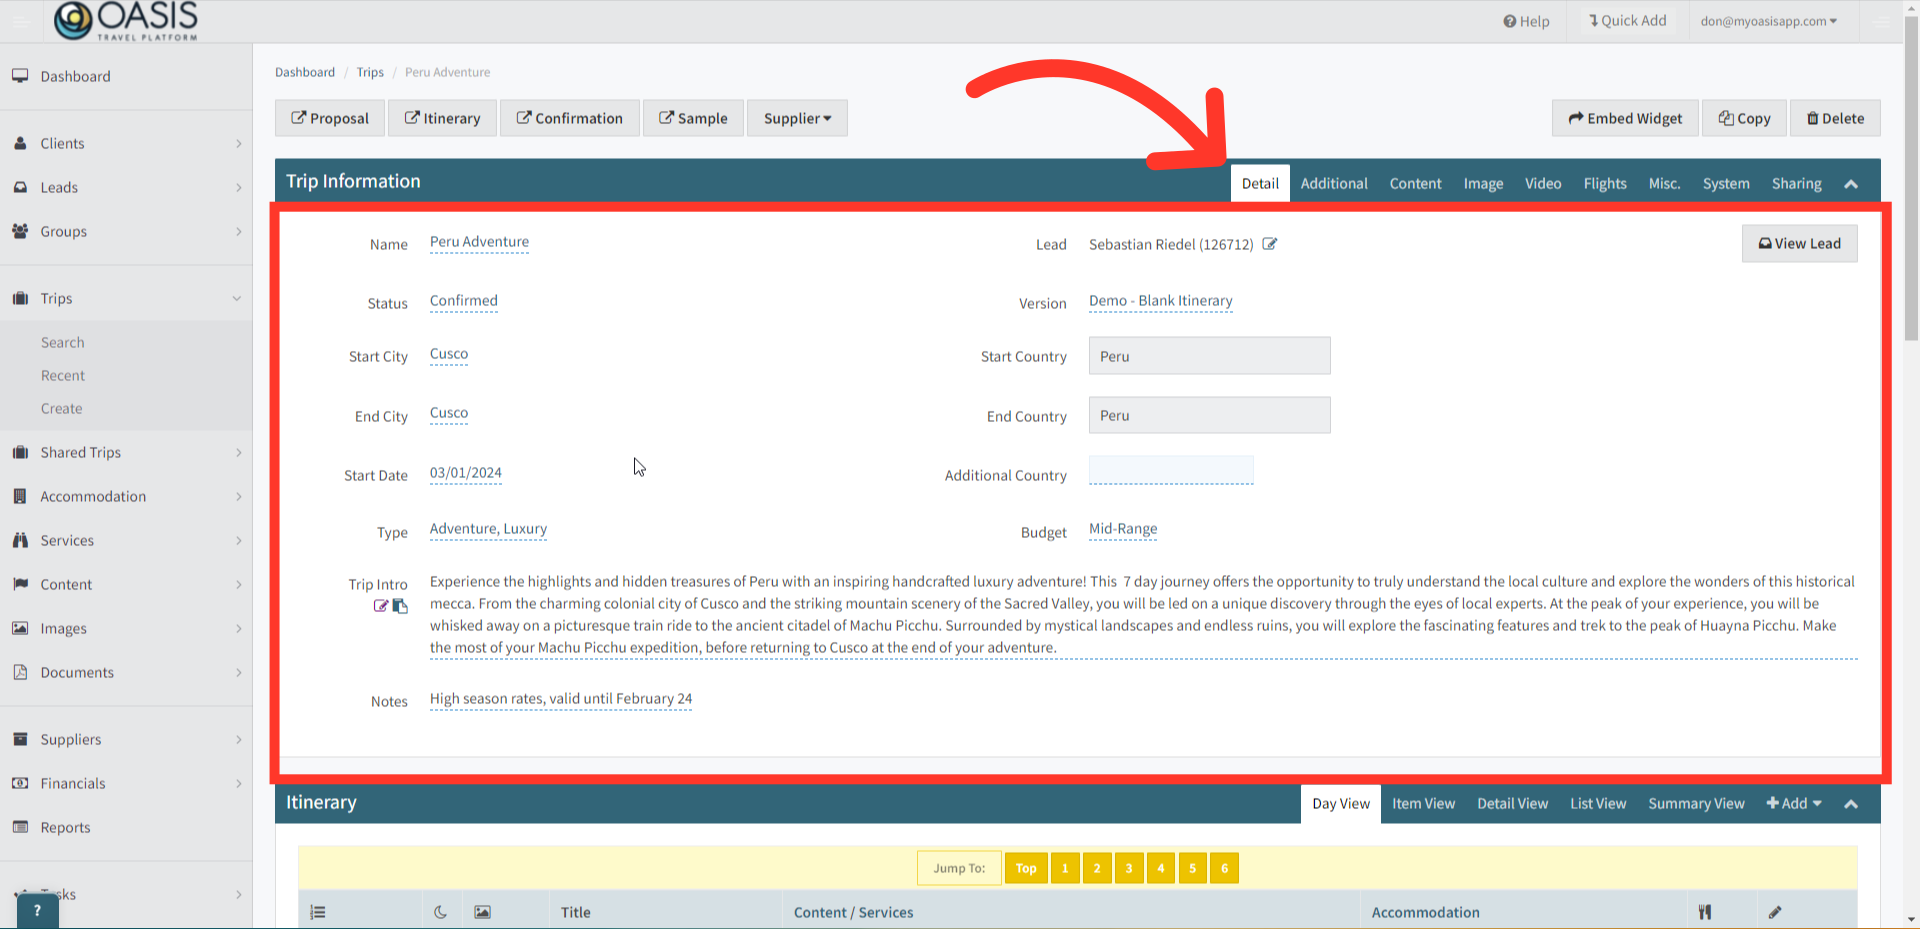
3. Here under the Trip Information section you'll see information to build out the trip under the Detail Tab. This will help capture meta data for trip search ability as well as drive other components of Oasis.
 | To Learn More About Trip Details Click Here! |
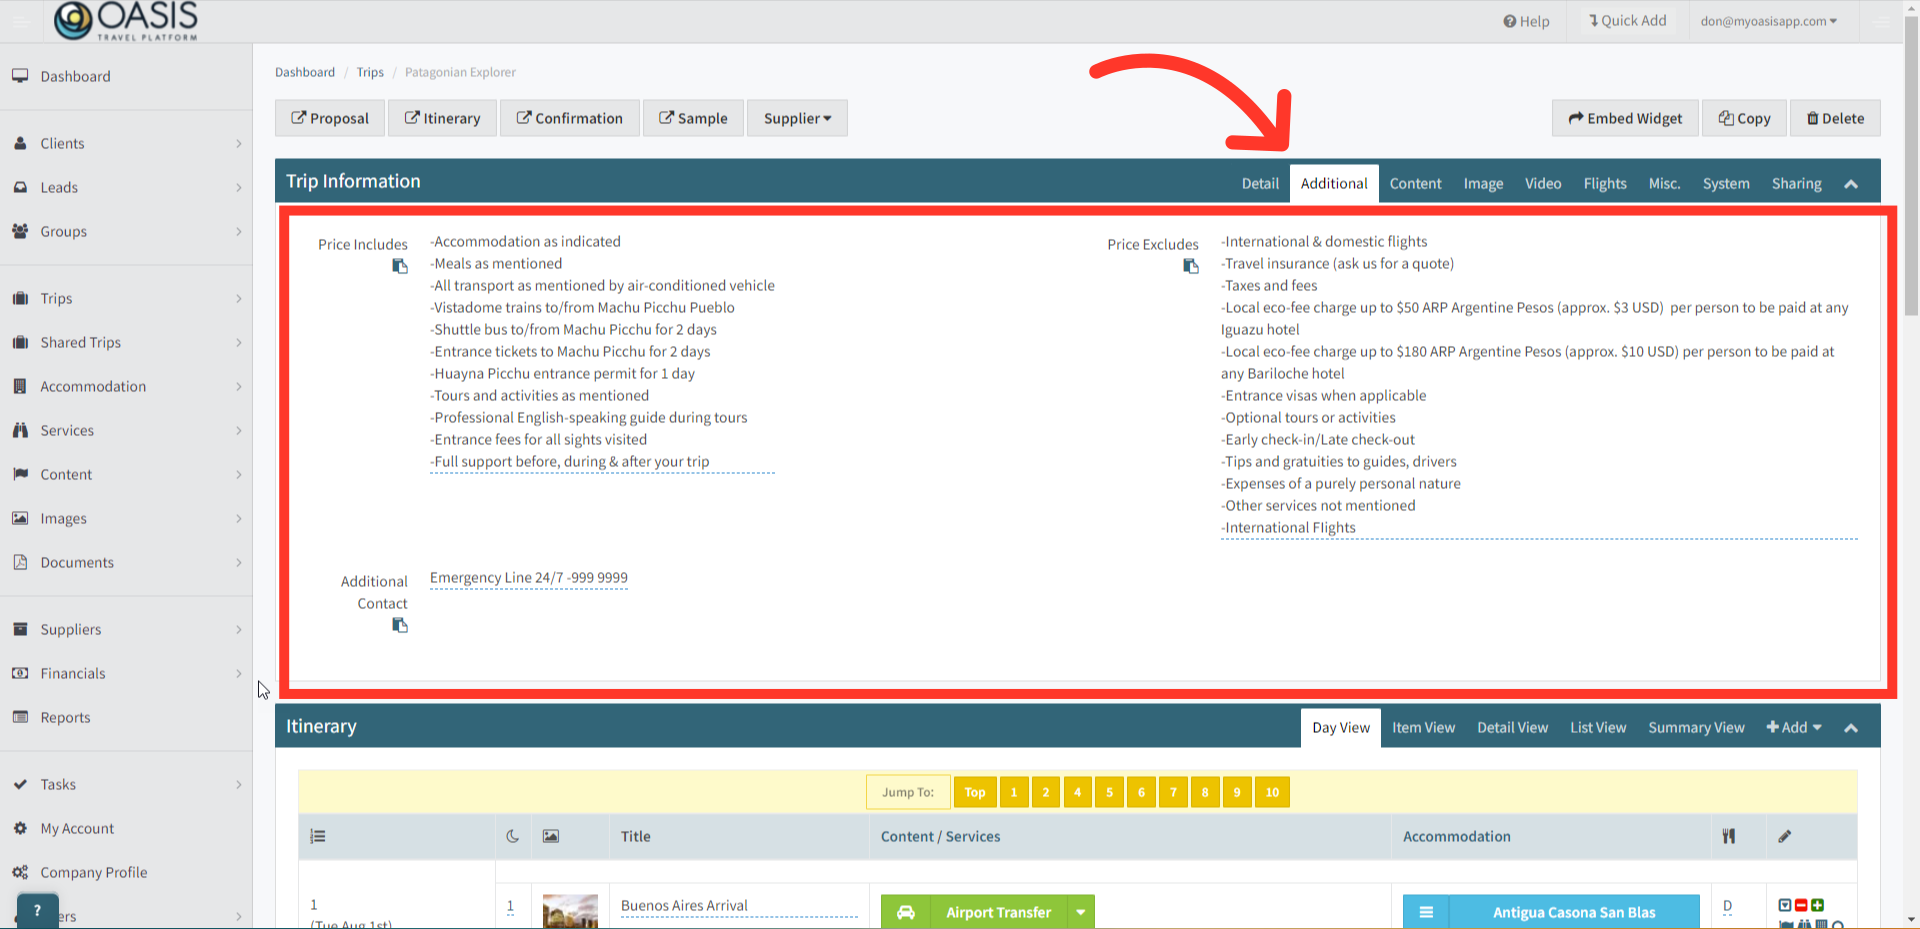
4. On the Additional tab, the price includes and excludes can be added to the trip along with any additional contact.
| To Learn More about Adding an Include/Excludes Template Click Here! |
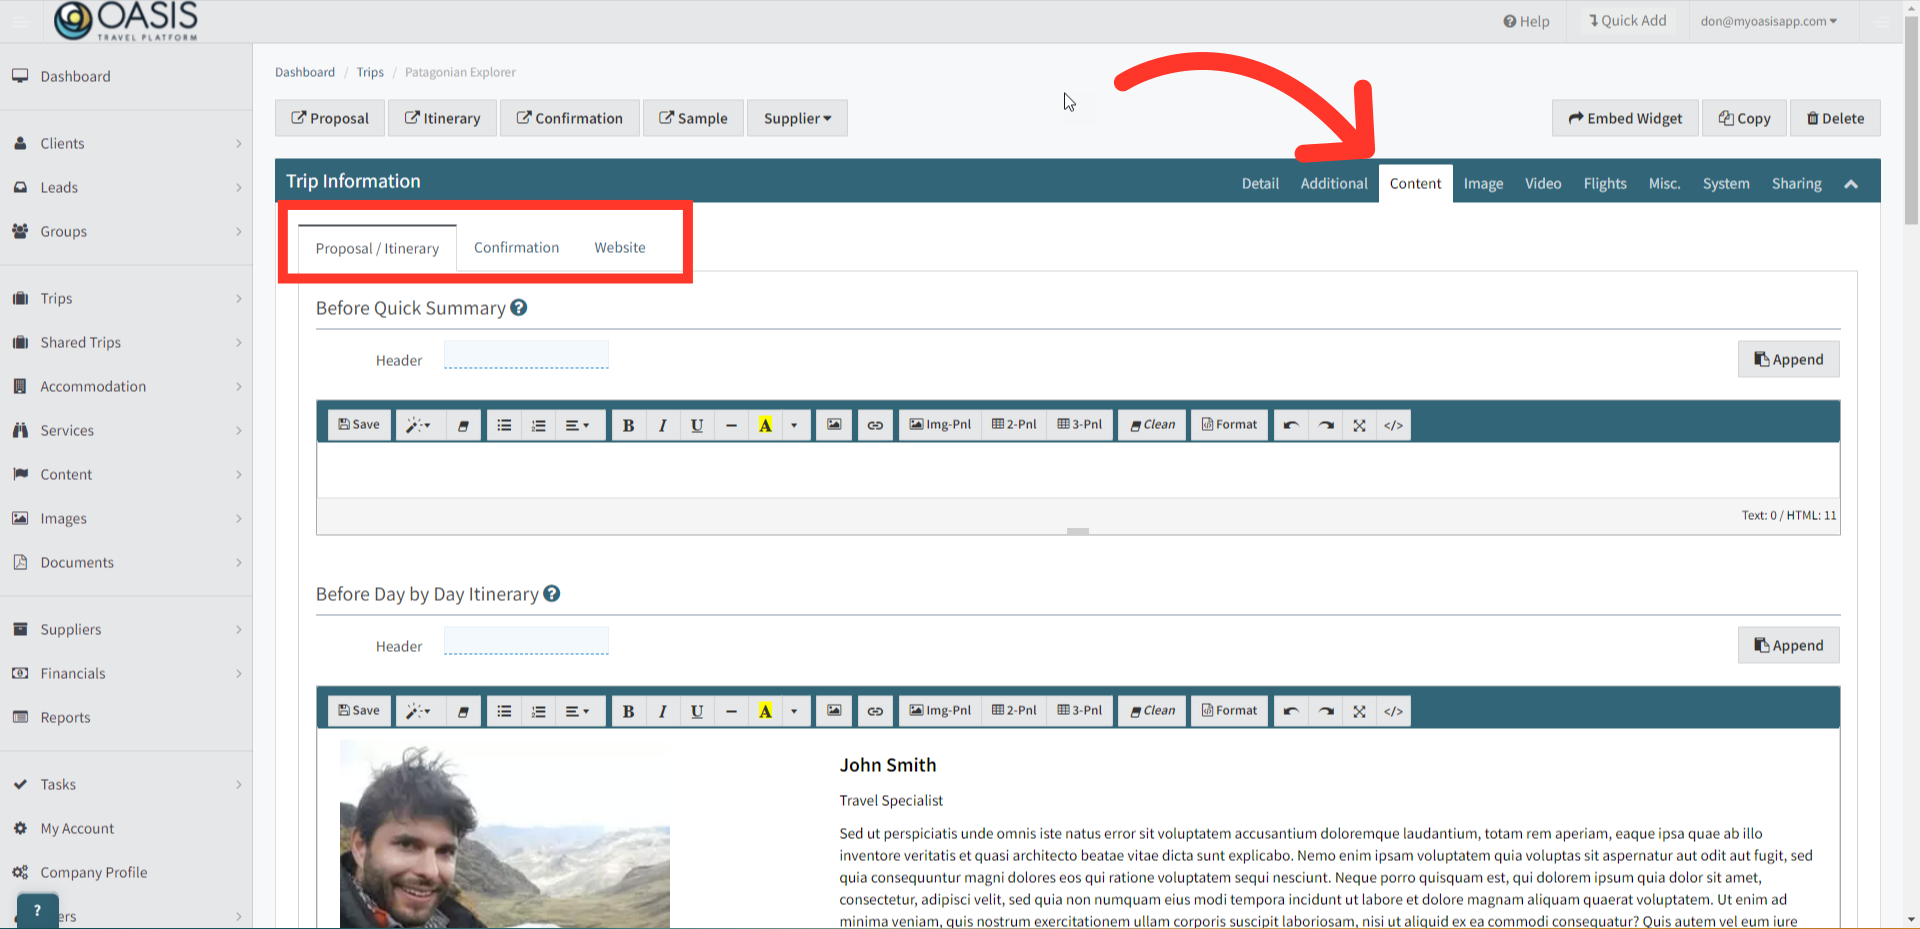
5. Under the Content section is where custom content can be created. Each tab within the Content tab are for the different itineraries and all content editable using HTML content. Example is adding Agent Introductions.
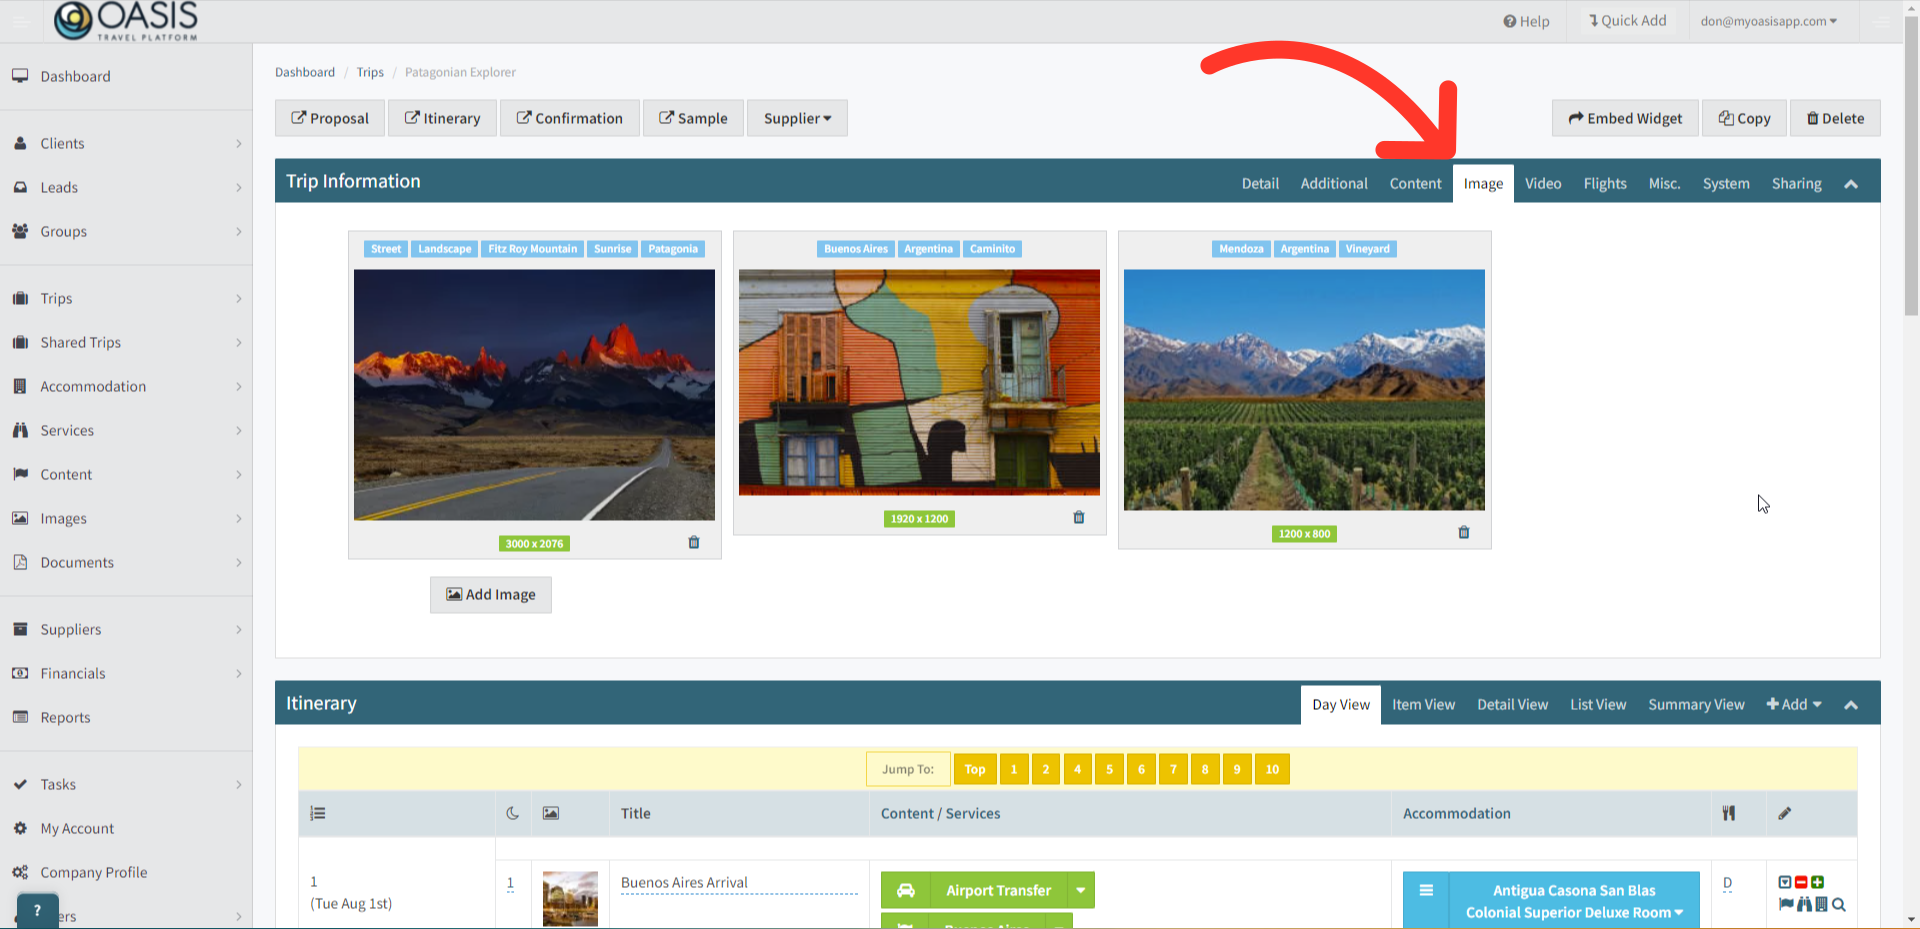
6. Under the Image tab is where you can use or upload your own images, or browse our curated library of over 3 million images.
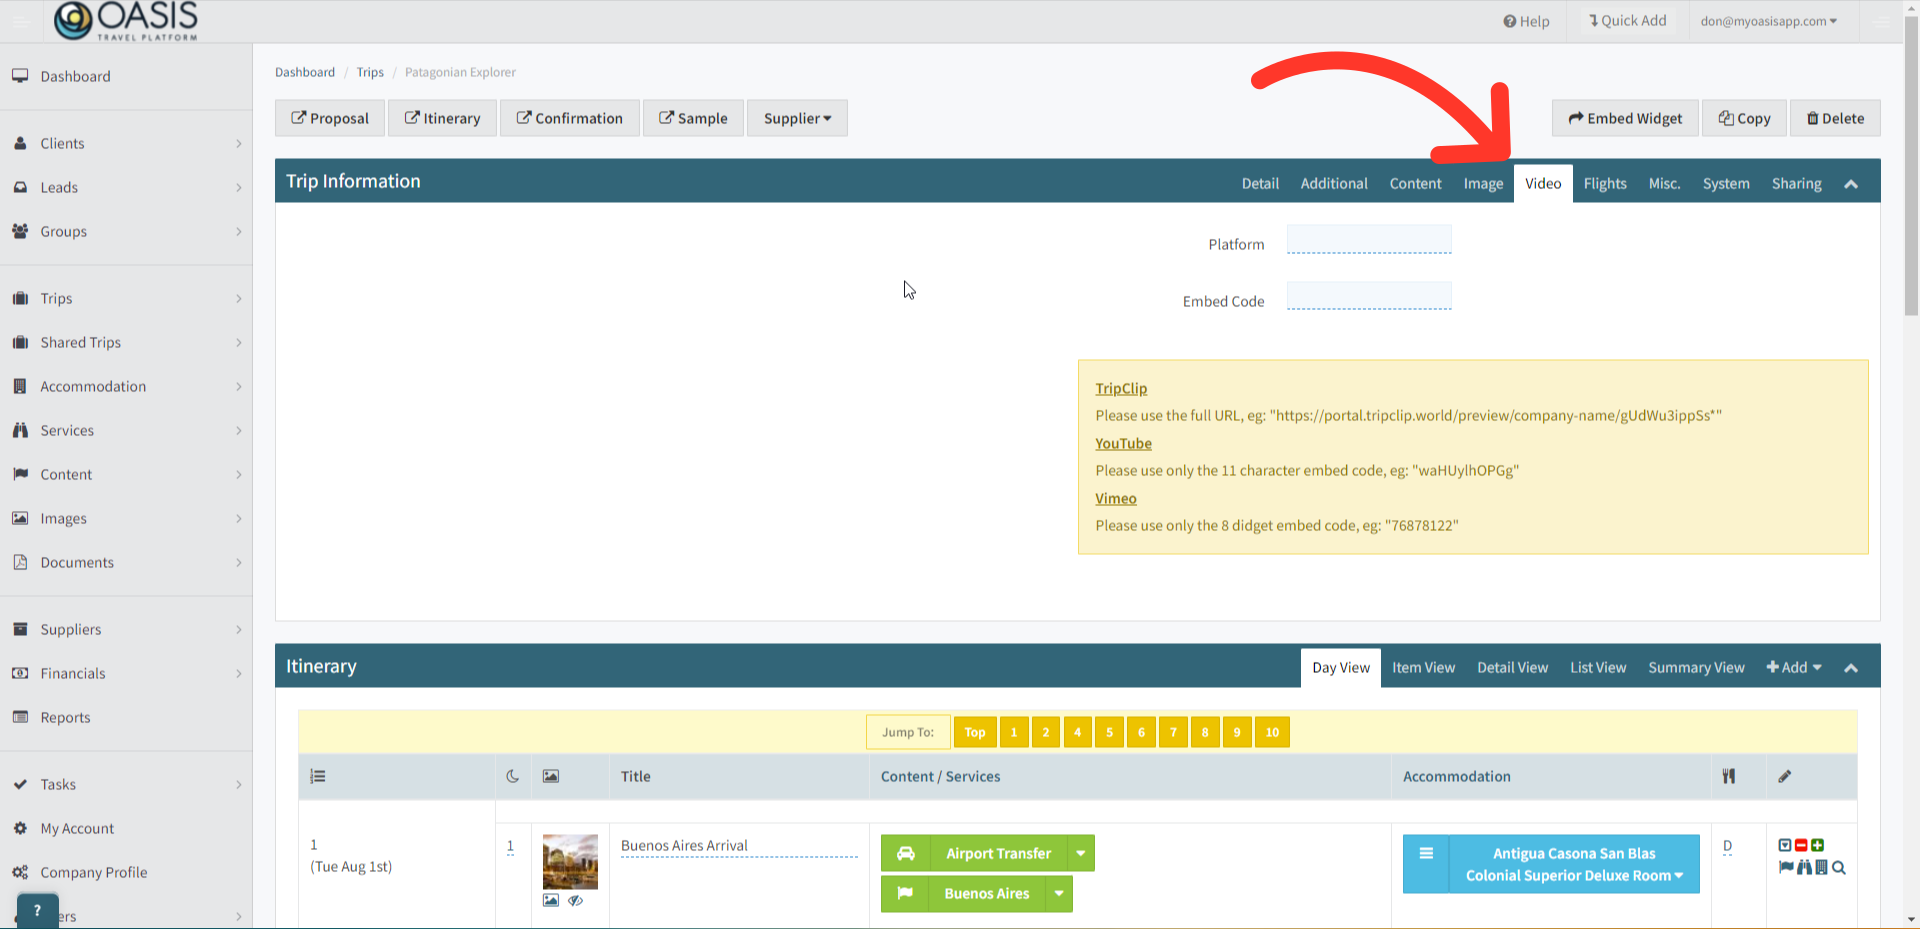
7. Under the Video tab is where you can add a hero video. Acceptable formats are from YouTube, Vimeo and TripClip. A handy link guide is in yellow.
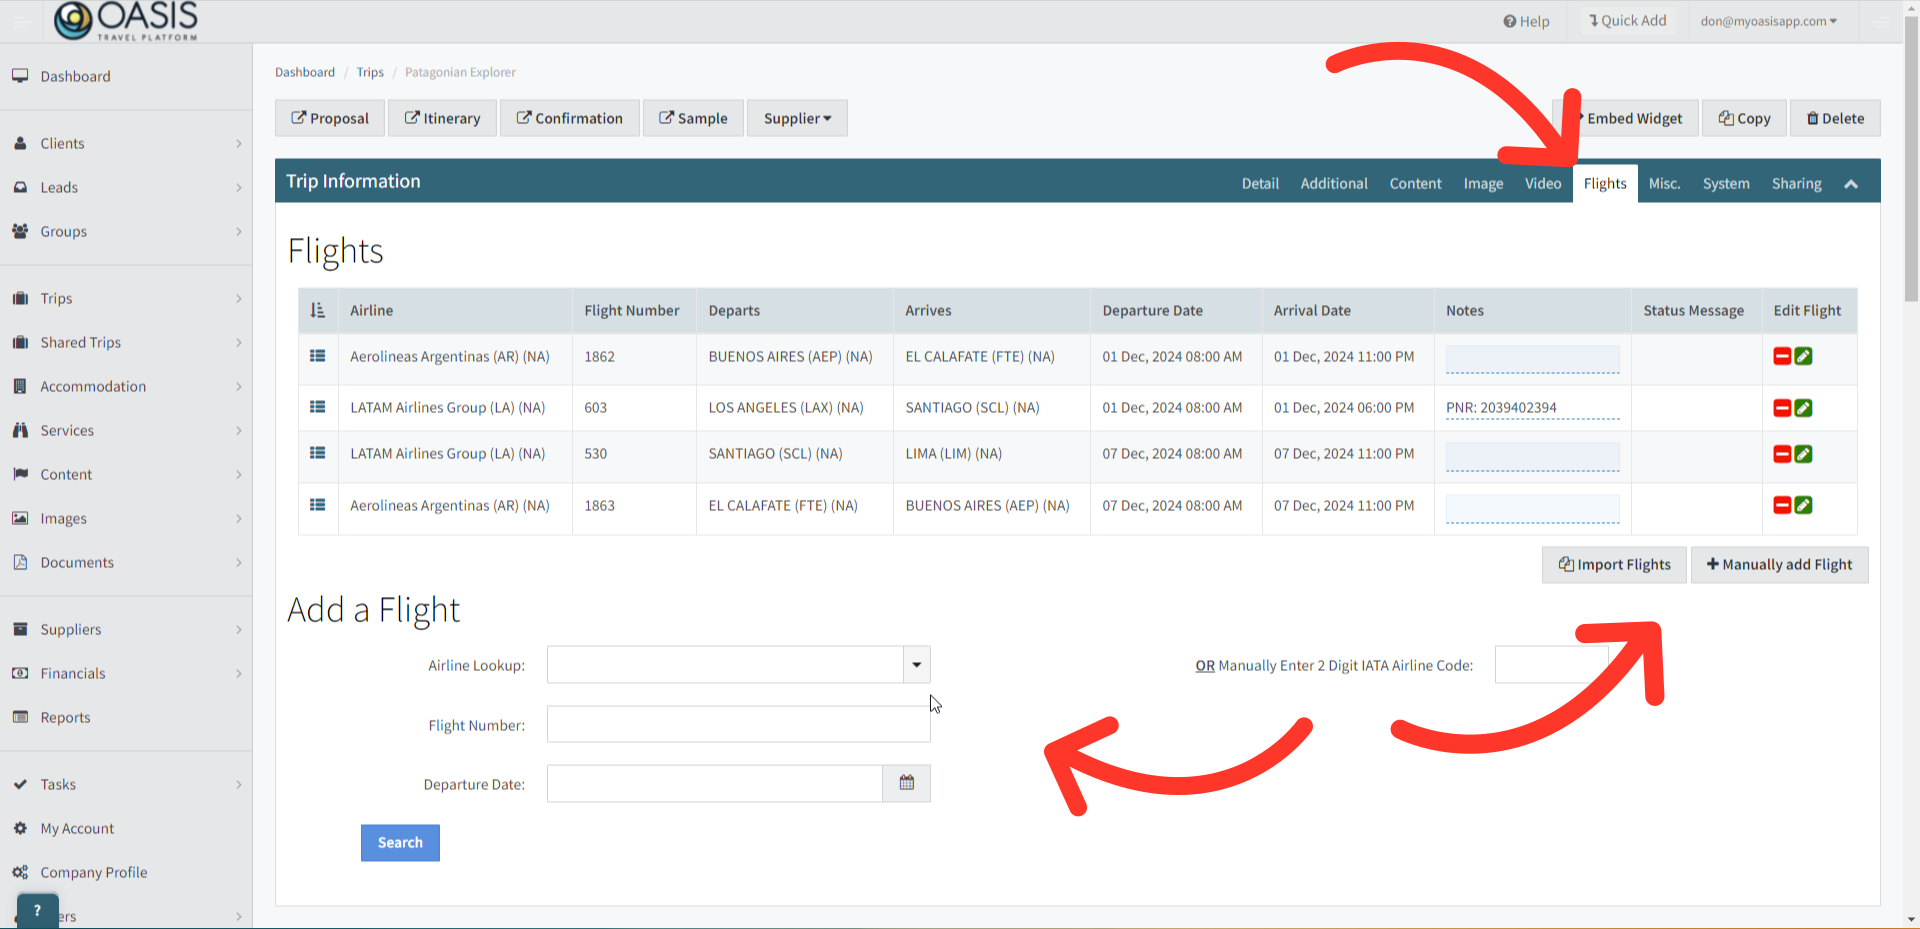
8. Under the Flights tab you can add a flight either by the airline, flight number or departure date, or, if the flight you are looking for is not found in our system, you can manually add the flight.
| Note: Flights that are manually added will not receive automatic status updates |
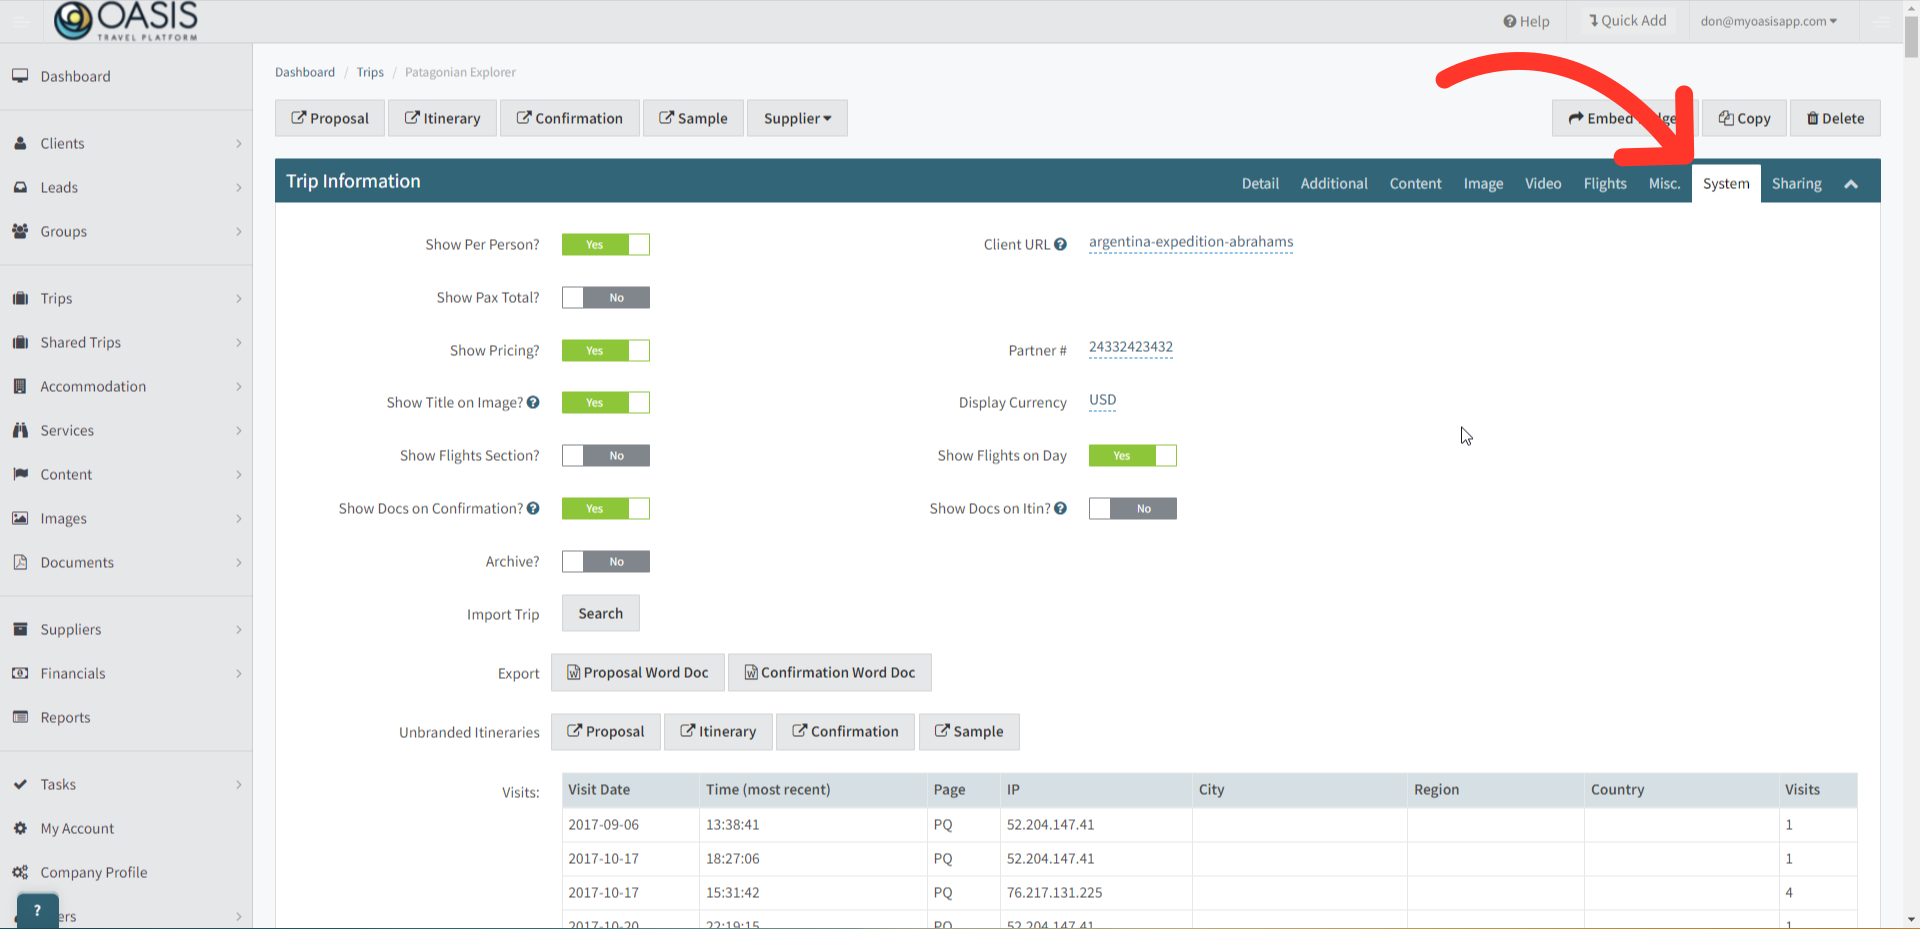
9. Under the Systems tab, has options for how the itinerary will look and what you can show or hide from the itinerary. Links to unbranded itineraries can be found here as well.
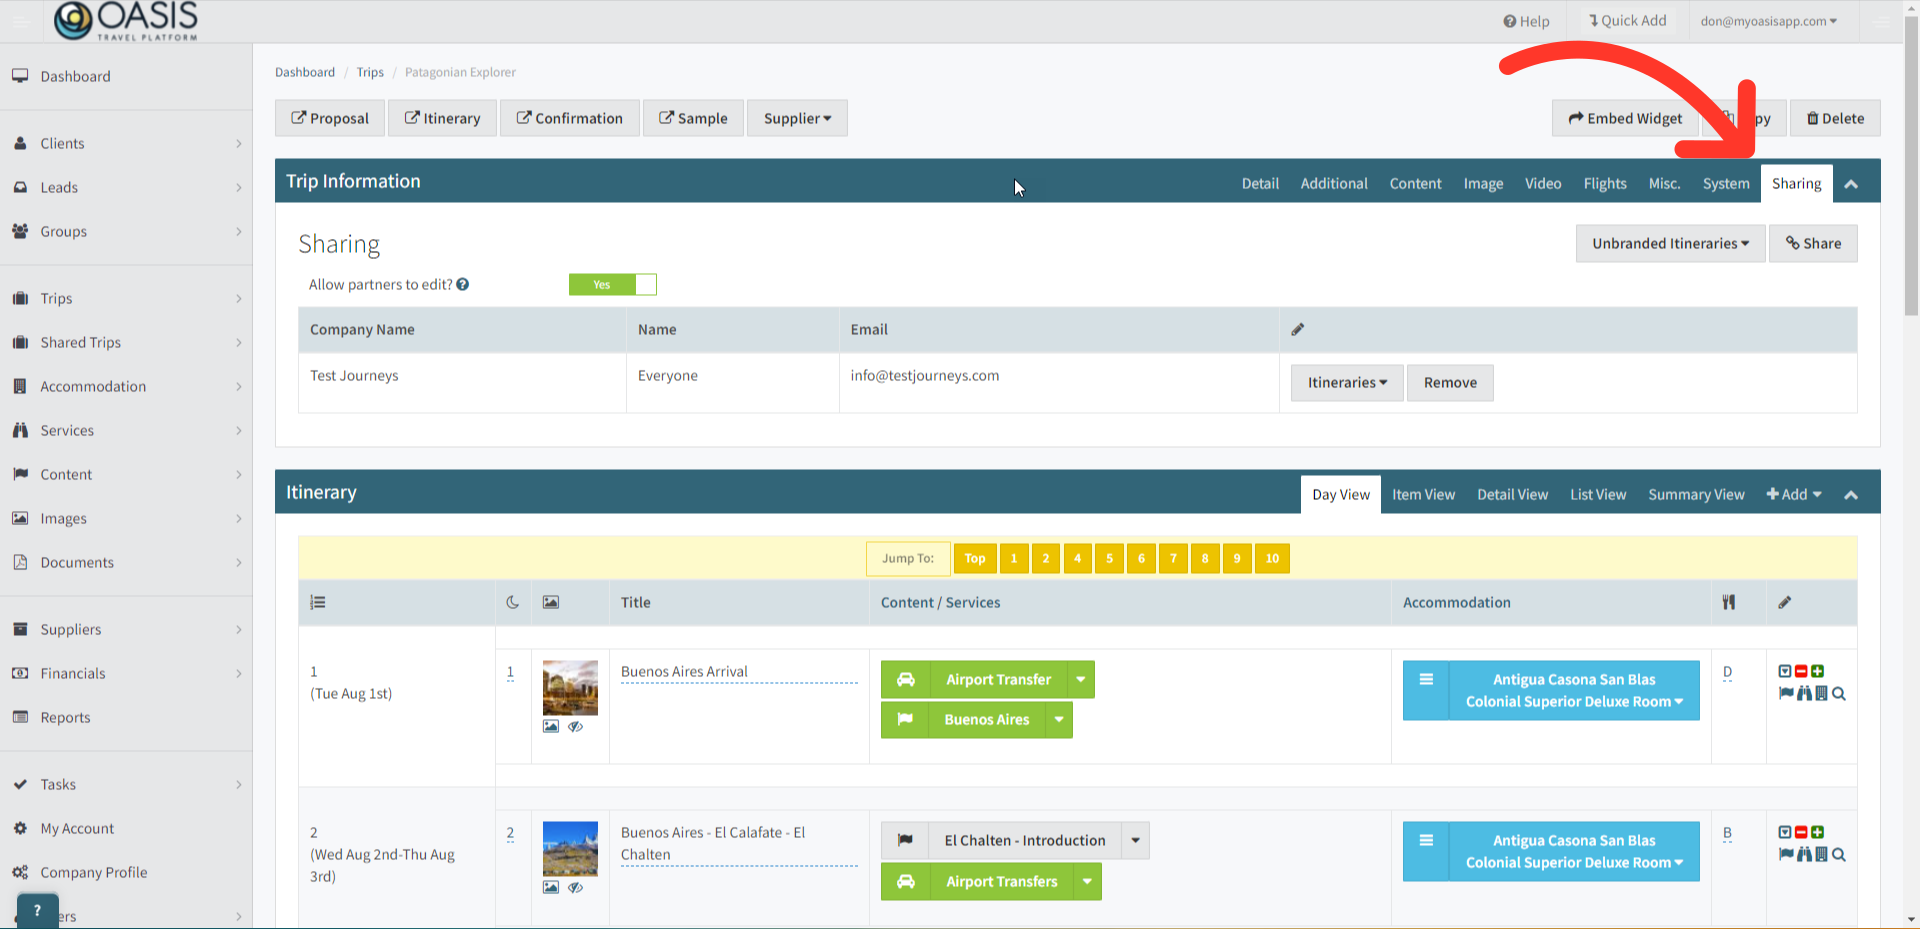
10. The Sharing tab you can see who the trip is shared with including the option to allow editing rights.
| To Learn More About Sharing Trips Click Here! |
11. In the section below Trip Information you'll see the Itinerary section. Here you can add days either one by one or in bulk.
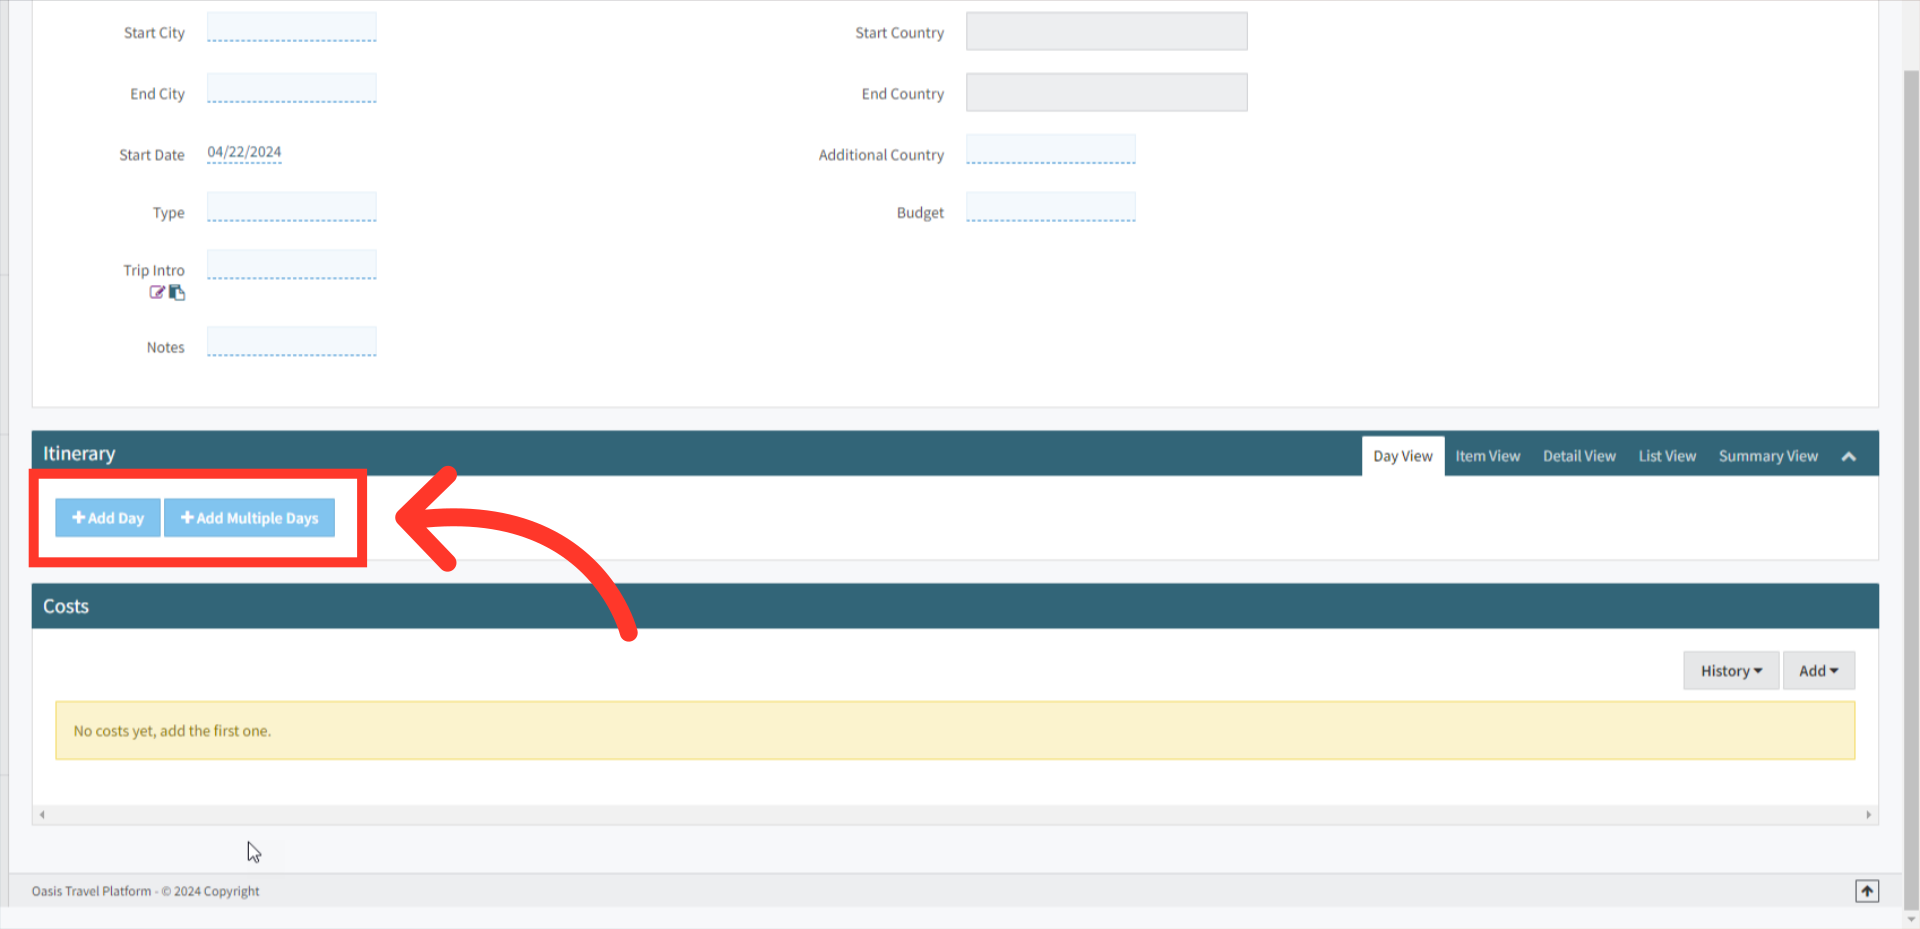
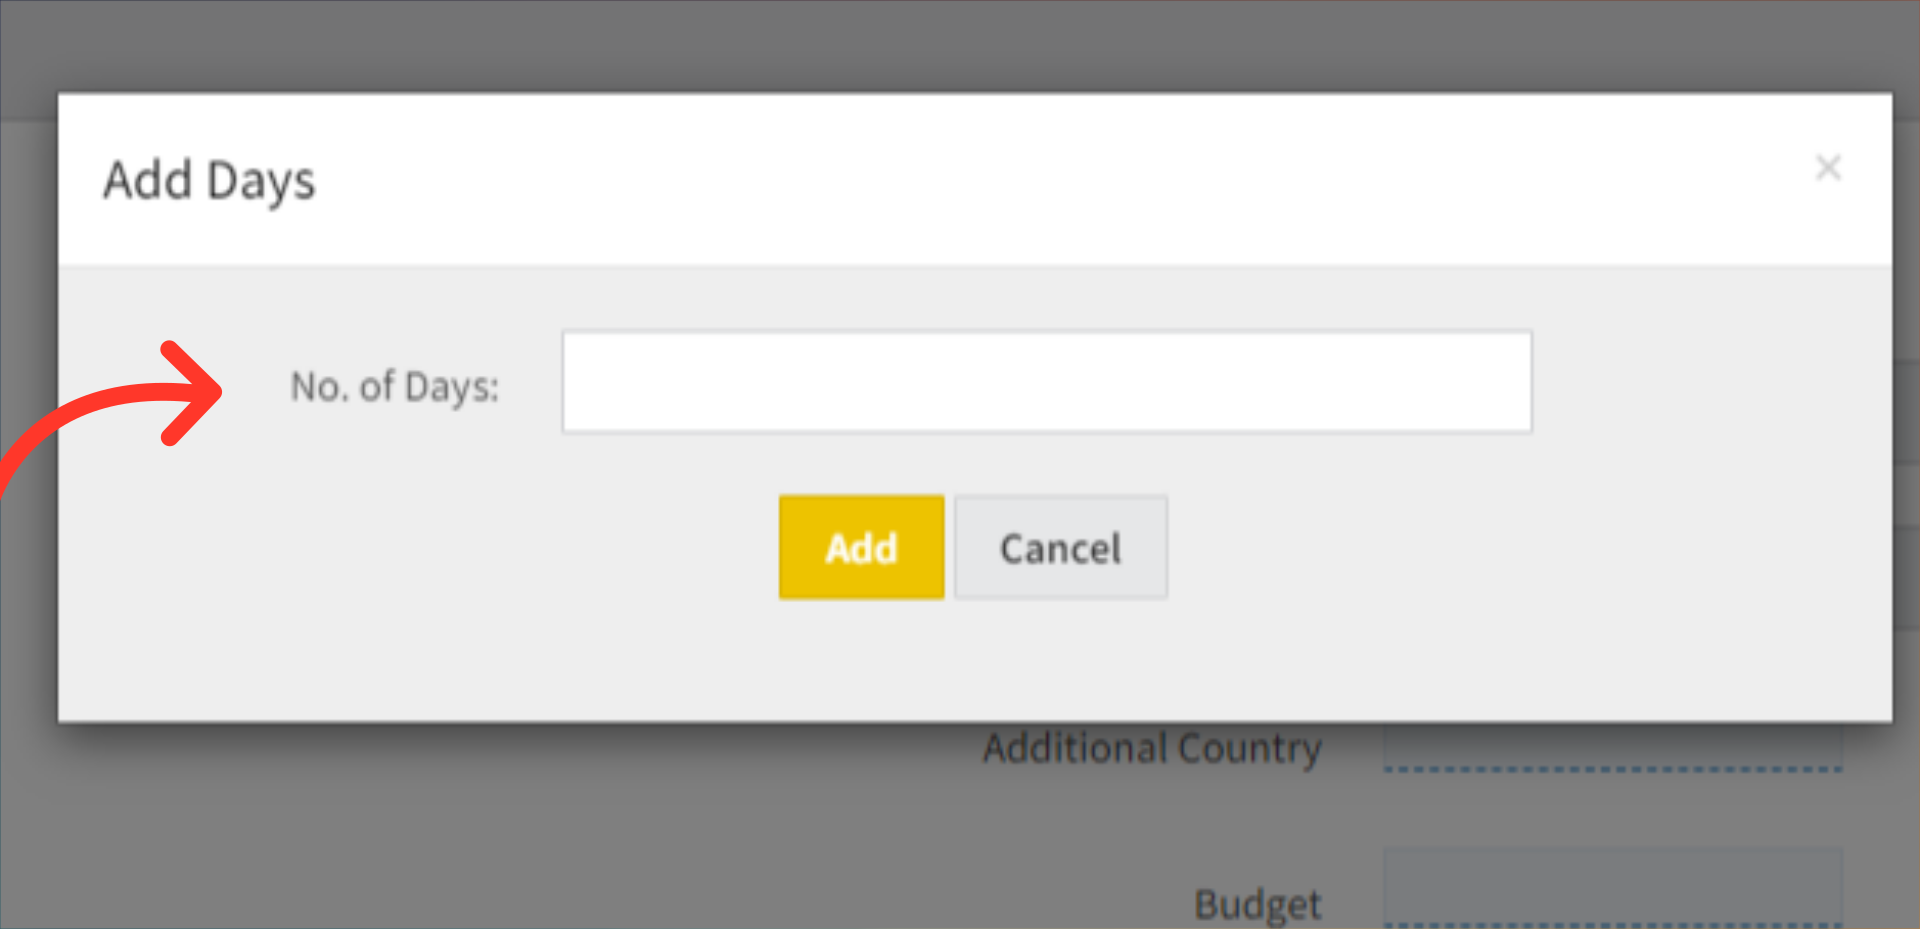
12. If your trip spans over several days, just click on "Add Multiple Days" and a box will appear. Type in the number of days you want to add, then click "Add" to include them in your itinerary.
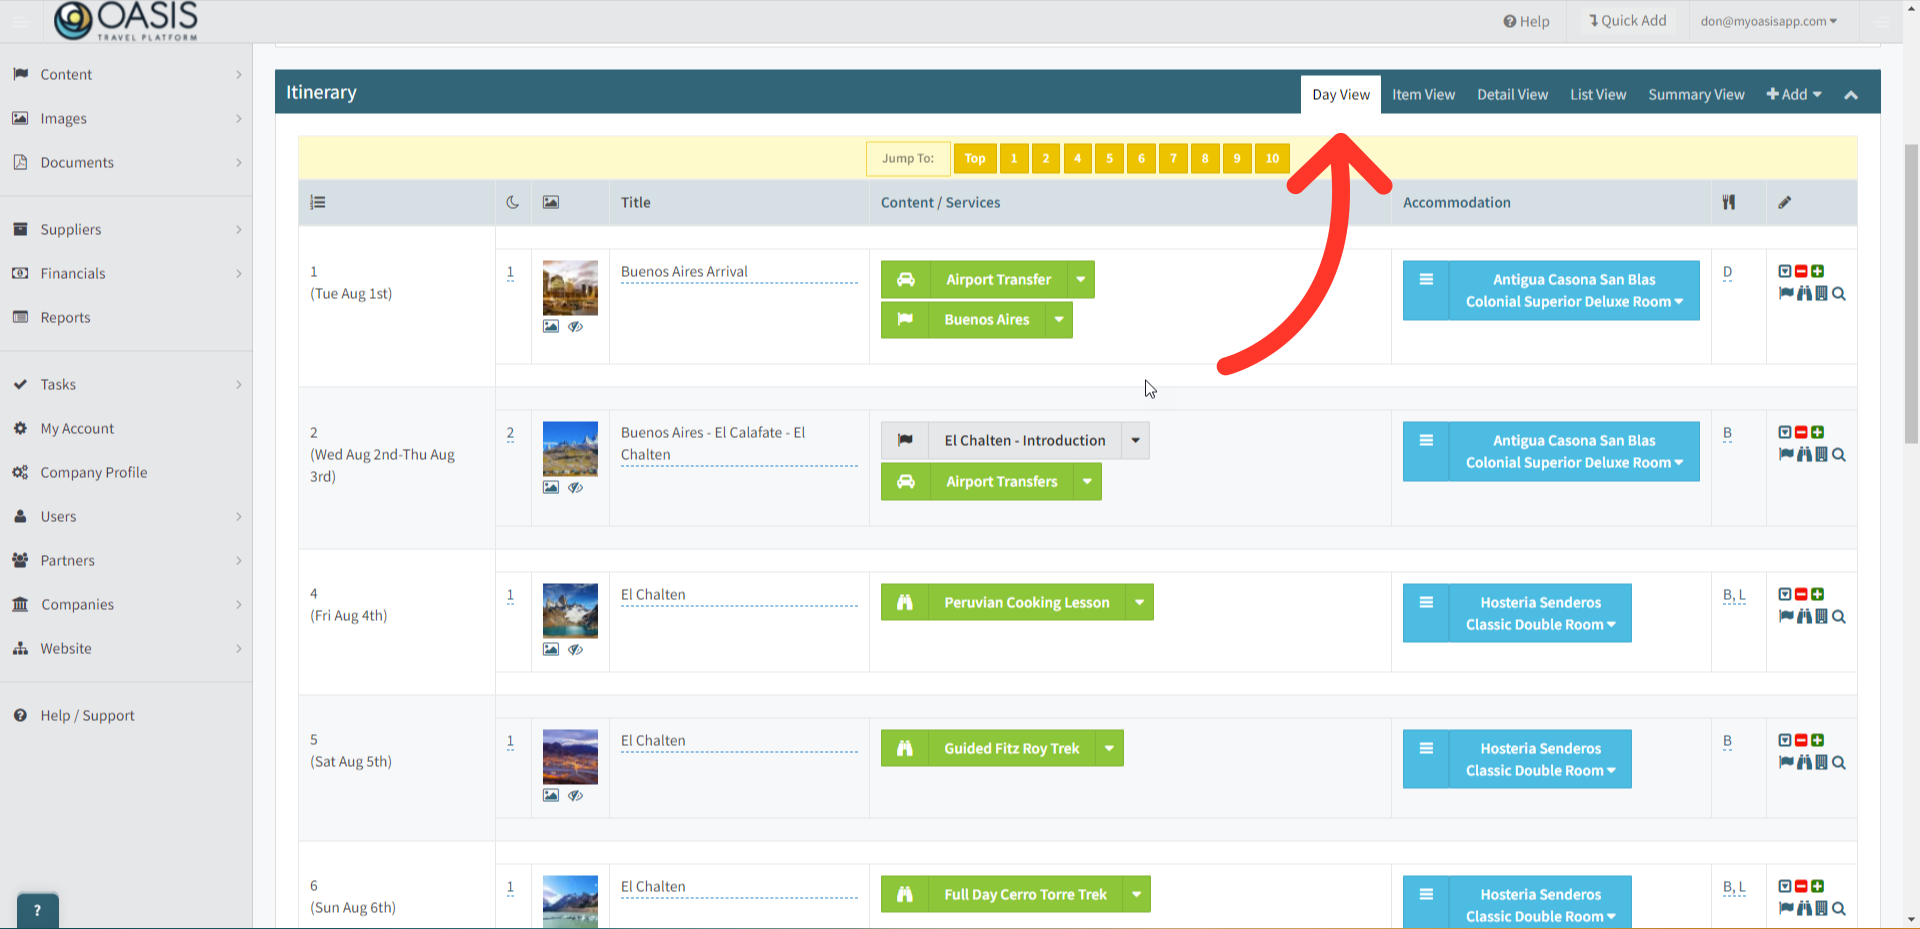
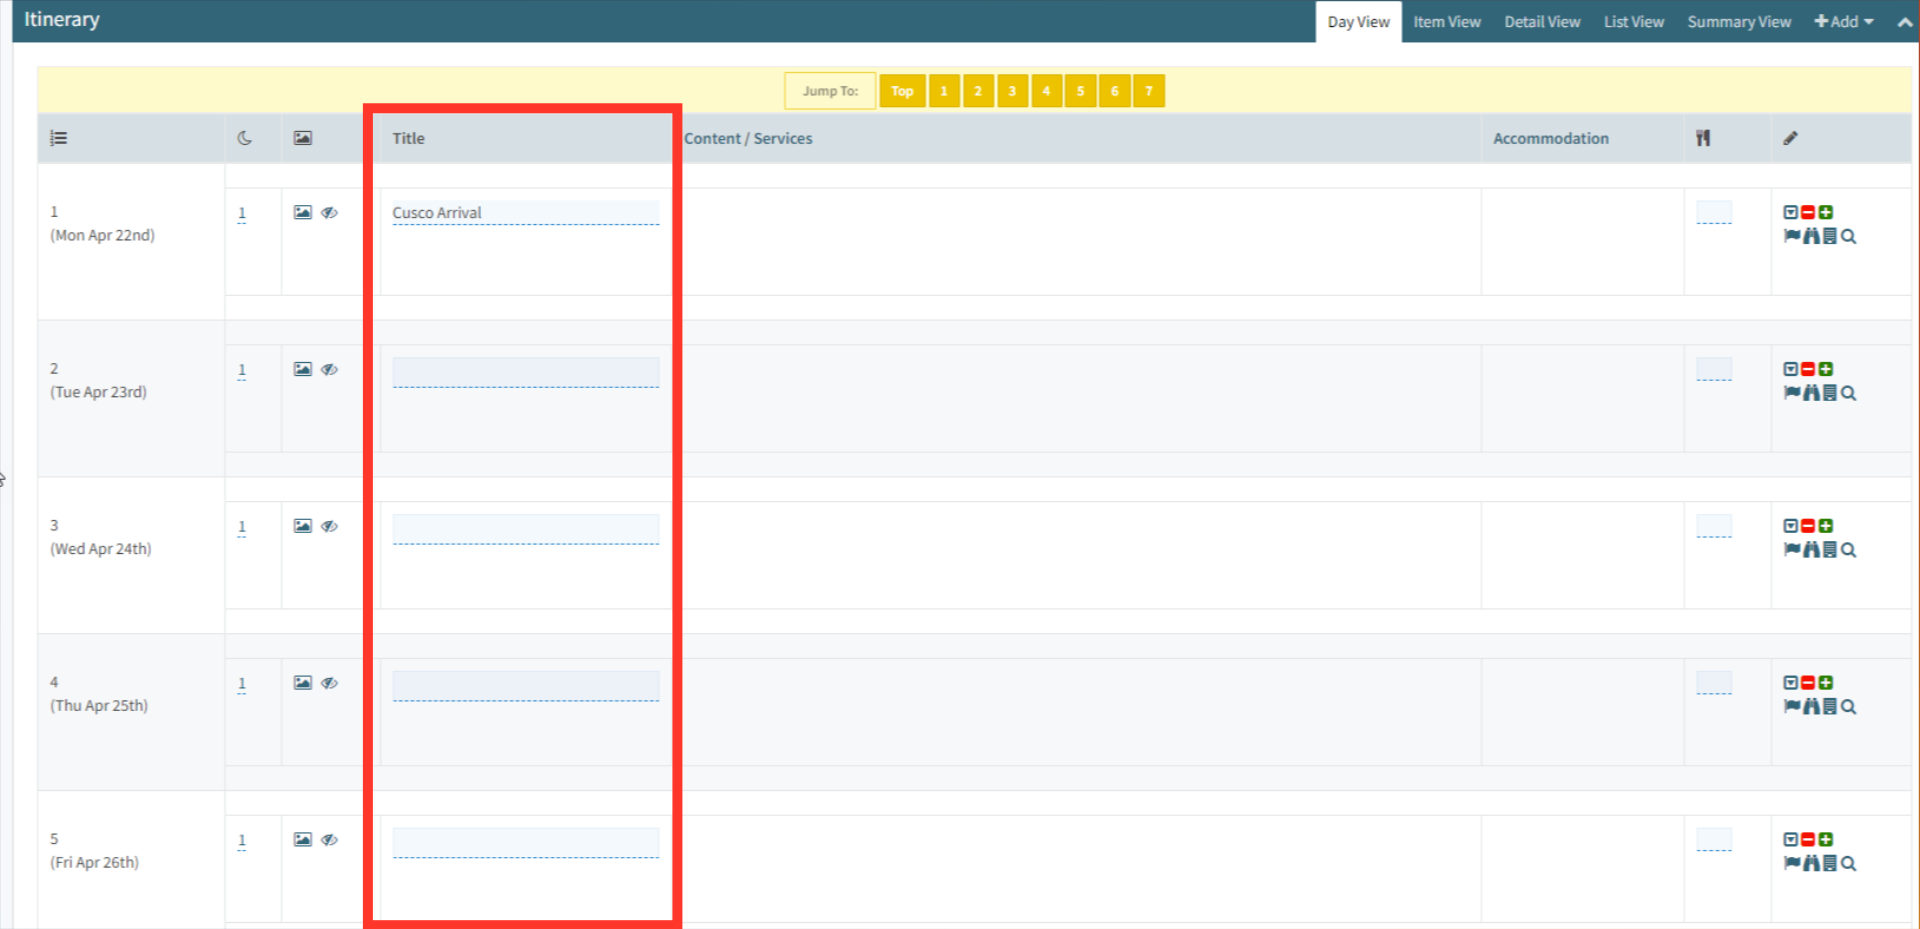
13. The default view is the Day View listing out the days allowing Content, Services, Accommodations and Meals to be added or edited.
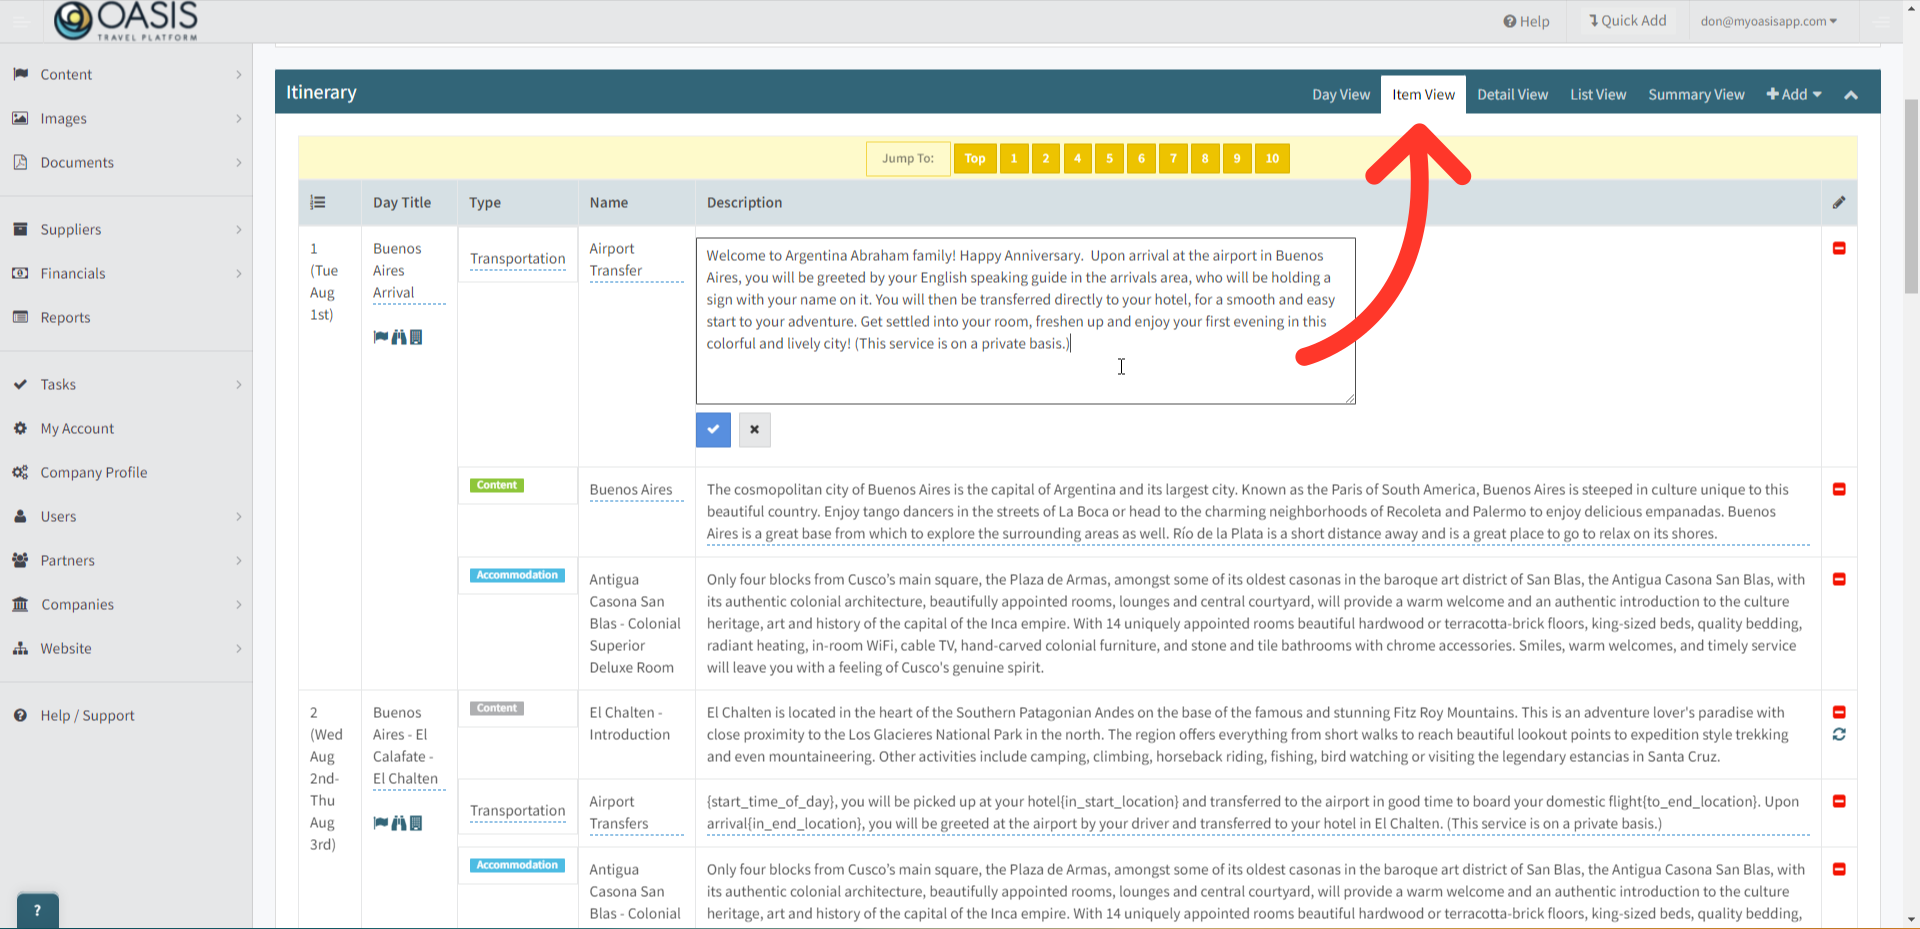
14. The Item View gives you the description on the itinerary, allowing you to directly edit descriptions, Day Titles, and Names. This view shows descriptions that appear in Proposals and Itineraries, providing a clear overview of the information your clients will see.
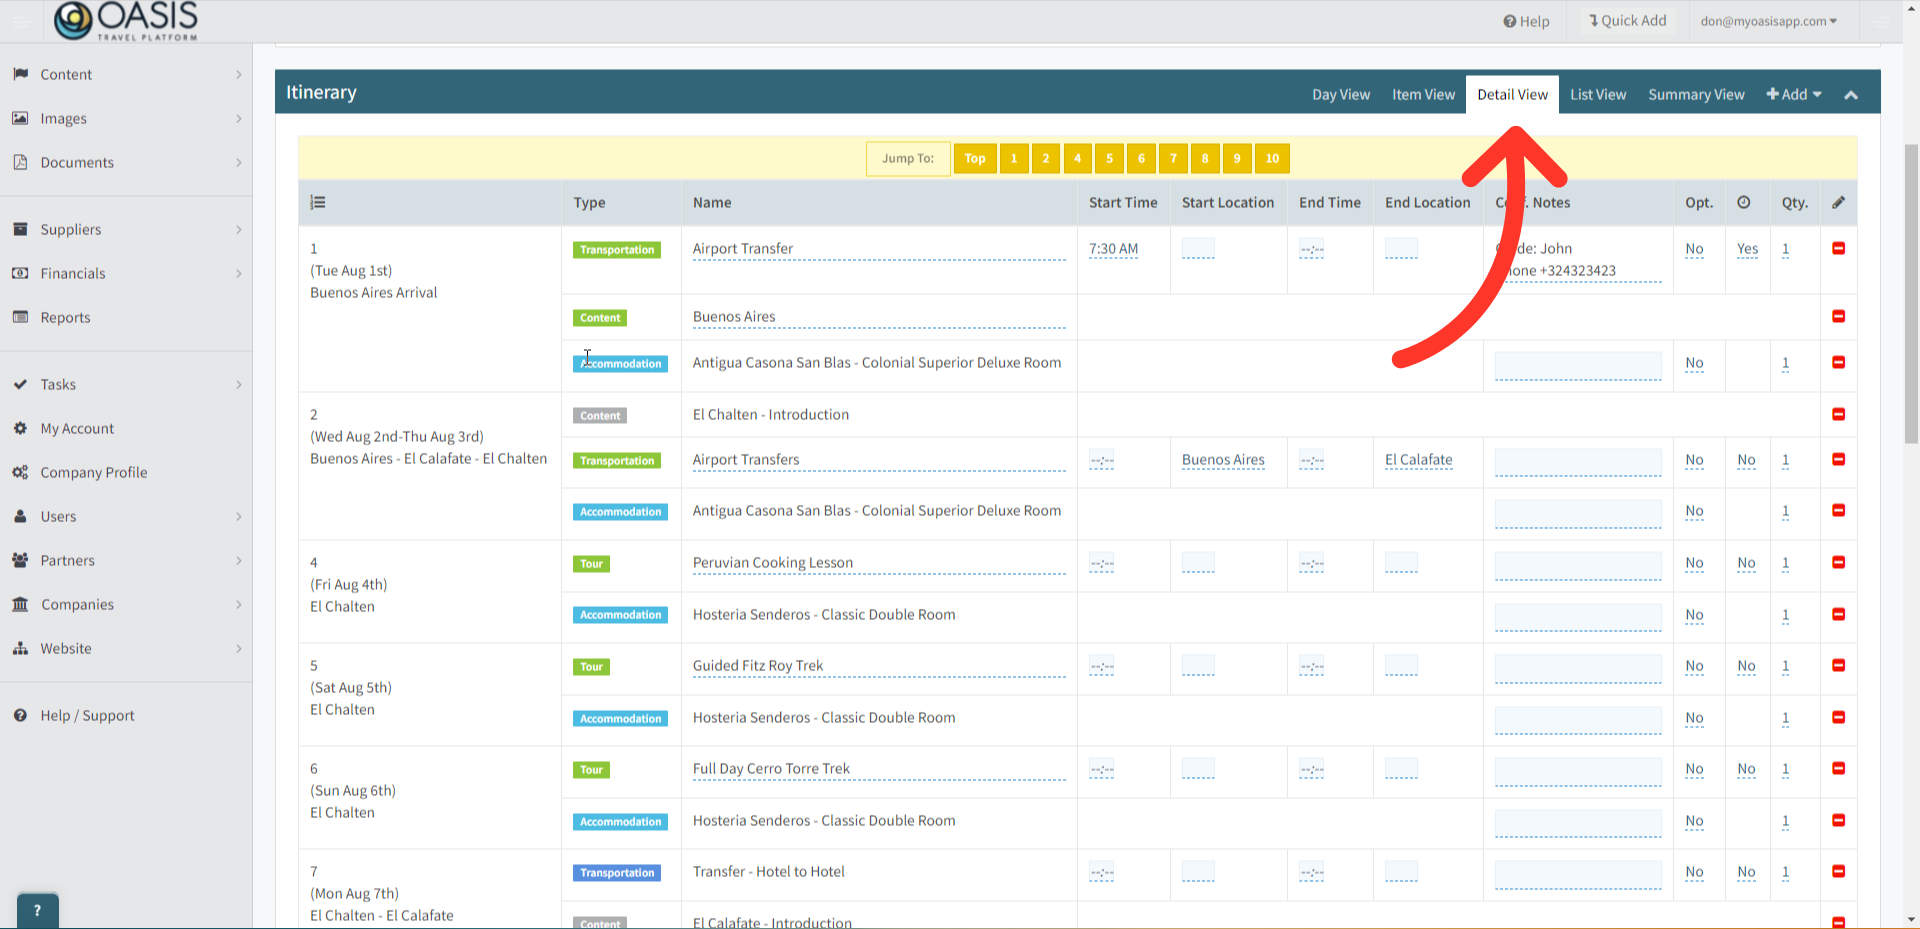
15. The Detail View focuses on times and notes for transit, tours, or anything having a start and end time or location. Here, you can find information that will be listed on the Confirmation view, ensuring that all critical details are accurately presented to your clients.
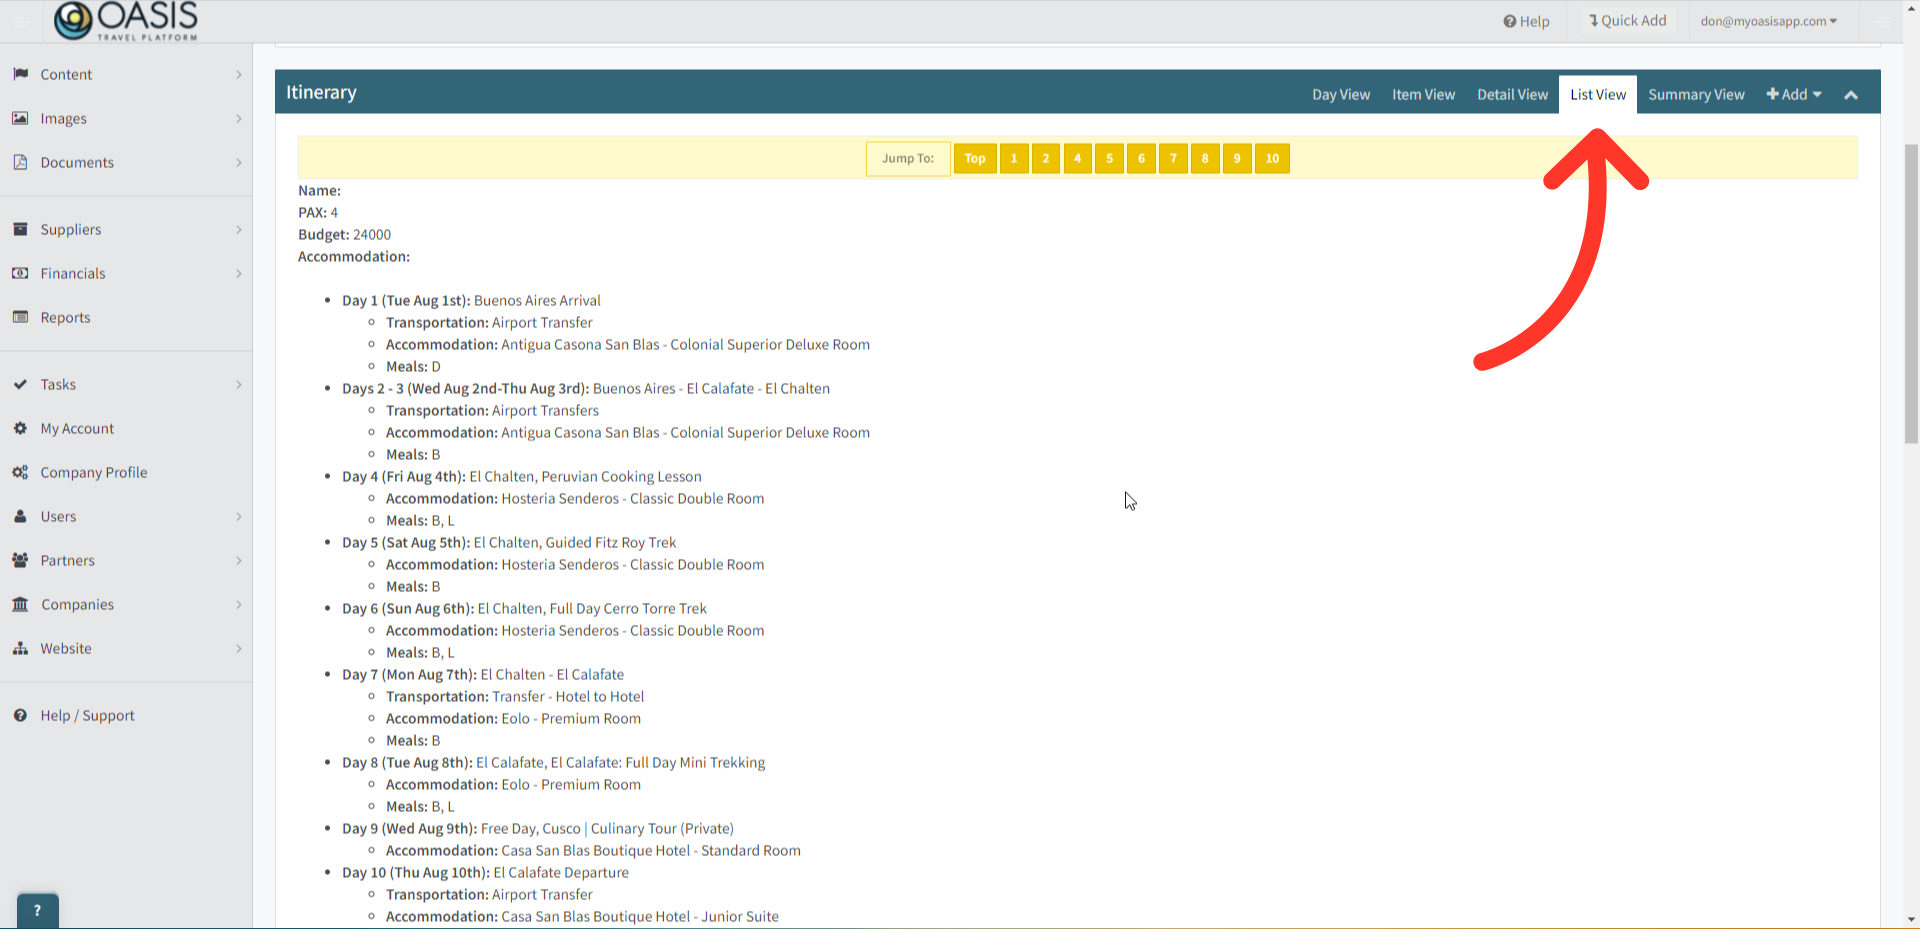
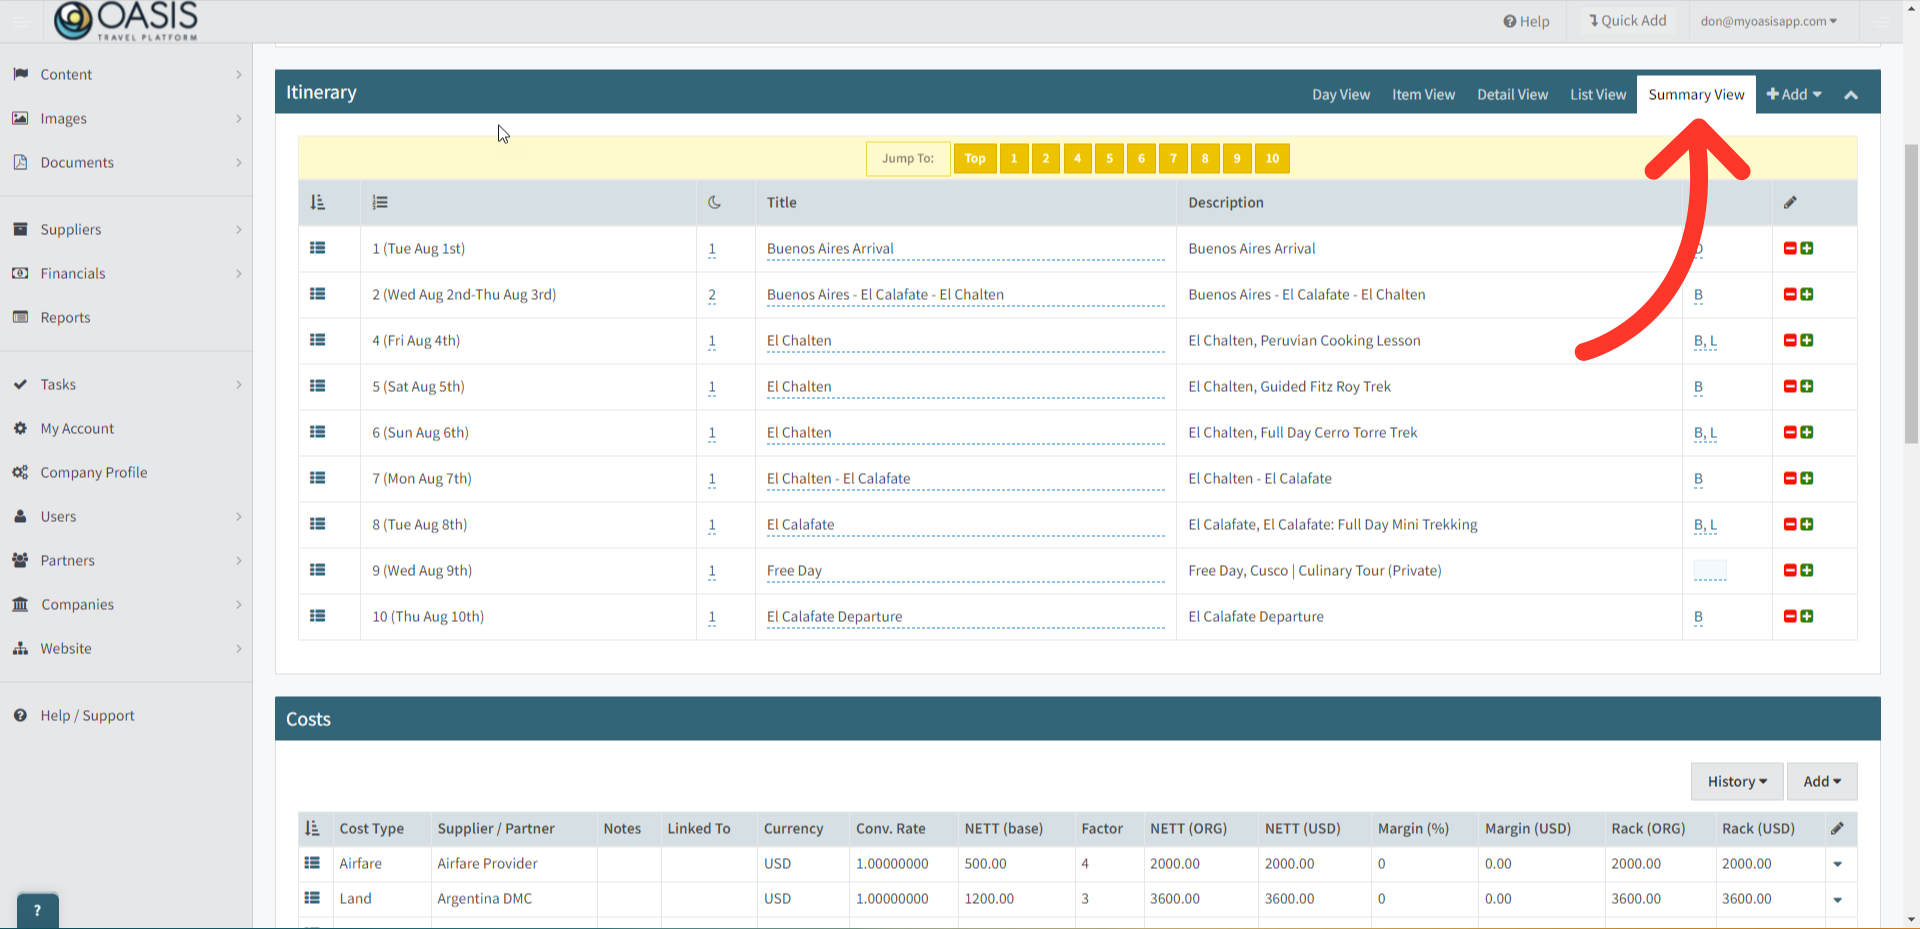
16. List View gives a bulleted summary of the trip.
17. The Summary View displays a concise editable view of the Trip. In this view, you can rearrange the order of days in a trip, allowing for easy adjustments to the trip itinerary to better suit your clients' needs.
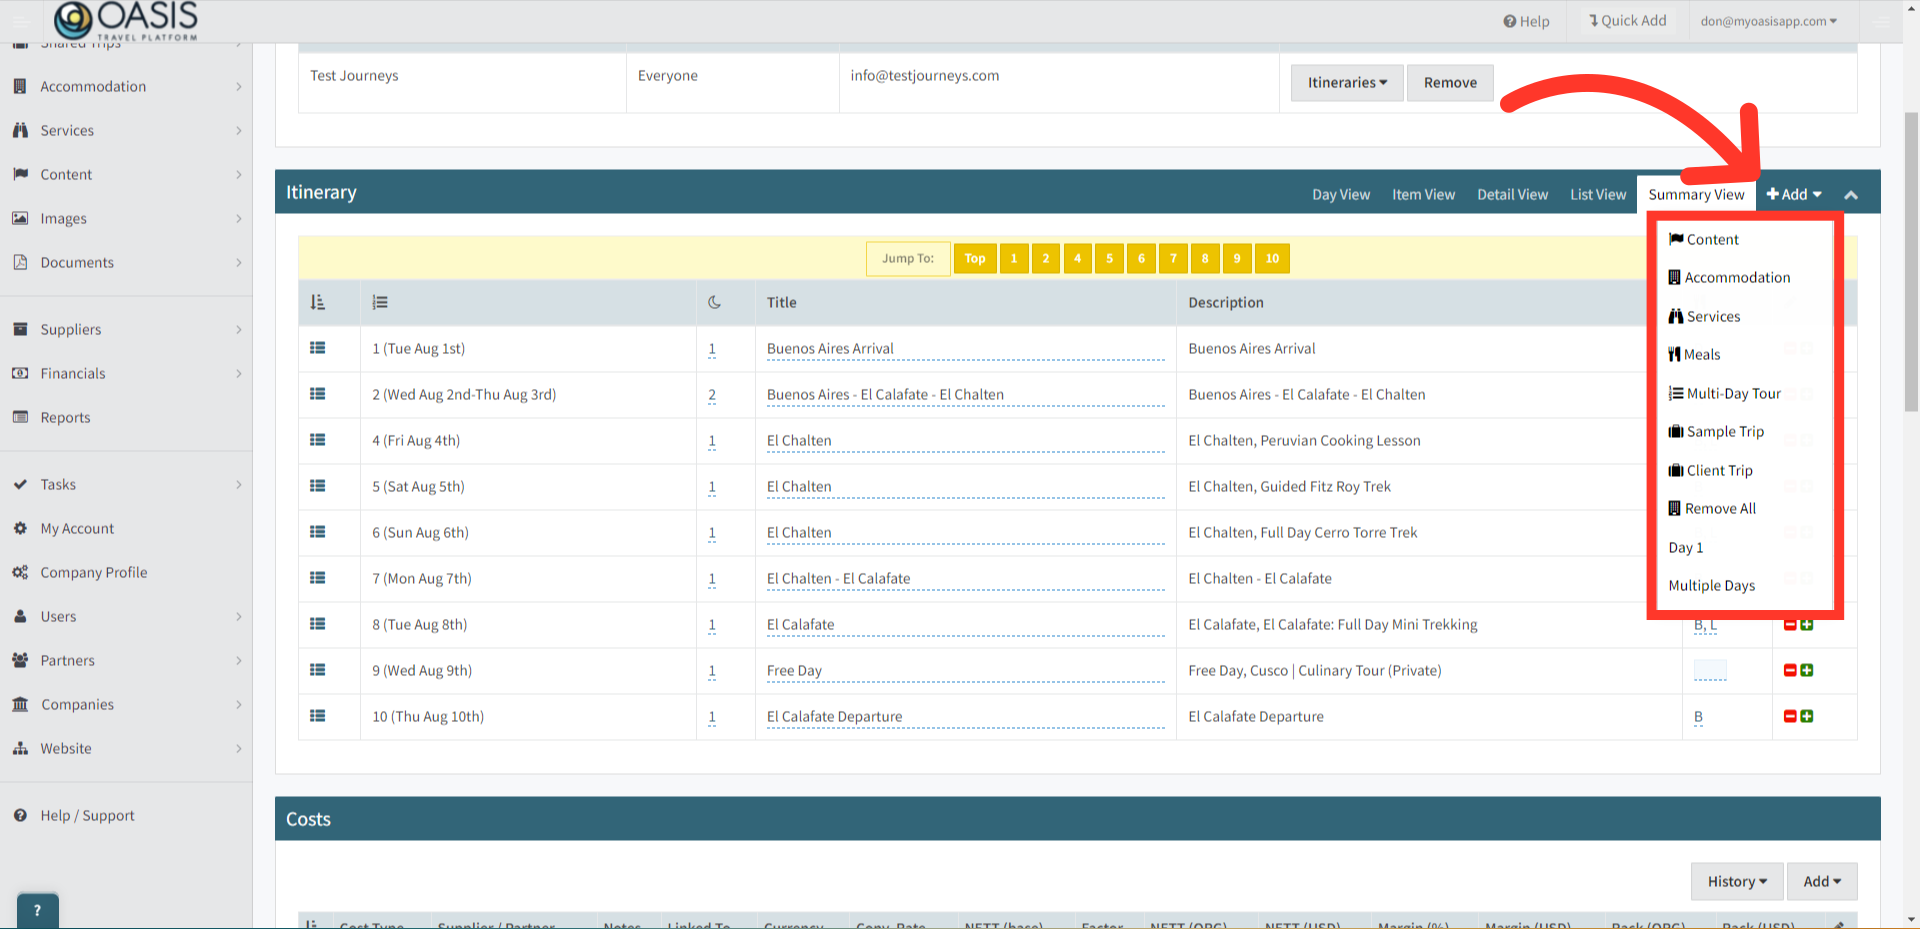
18. Clicking the Add tab displays a list where you can add items to itineraries, Meals, or include a Sample trip to clone over. You can also Remove All Itinerary days to start over and even add days.
| Missing Content? Access the Quick Add Shade to add the missing content! |

21. Now, with a few empty days added, start by adding titles to each day.
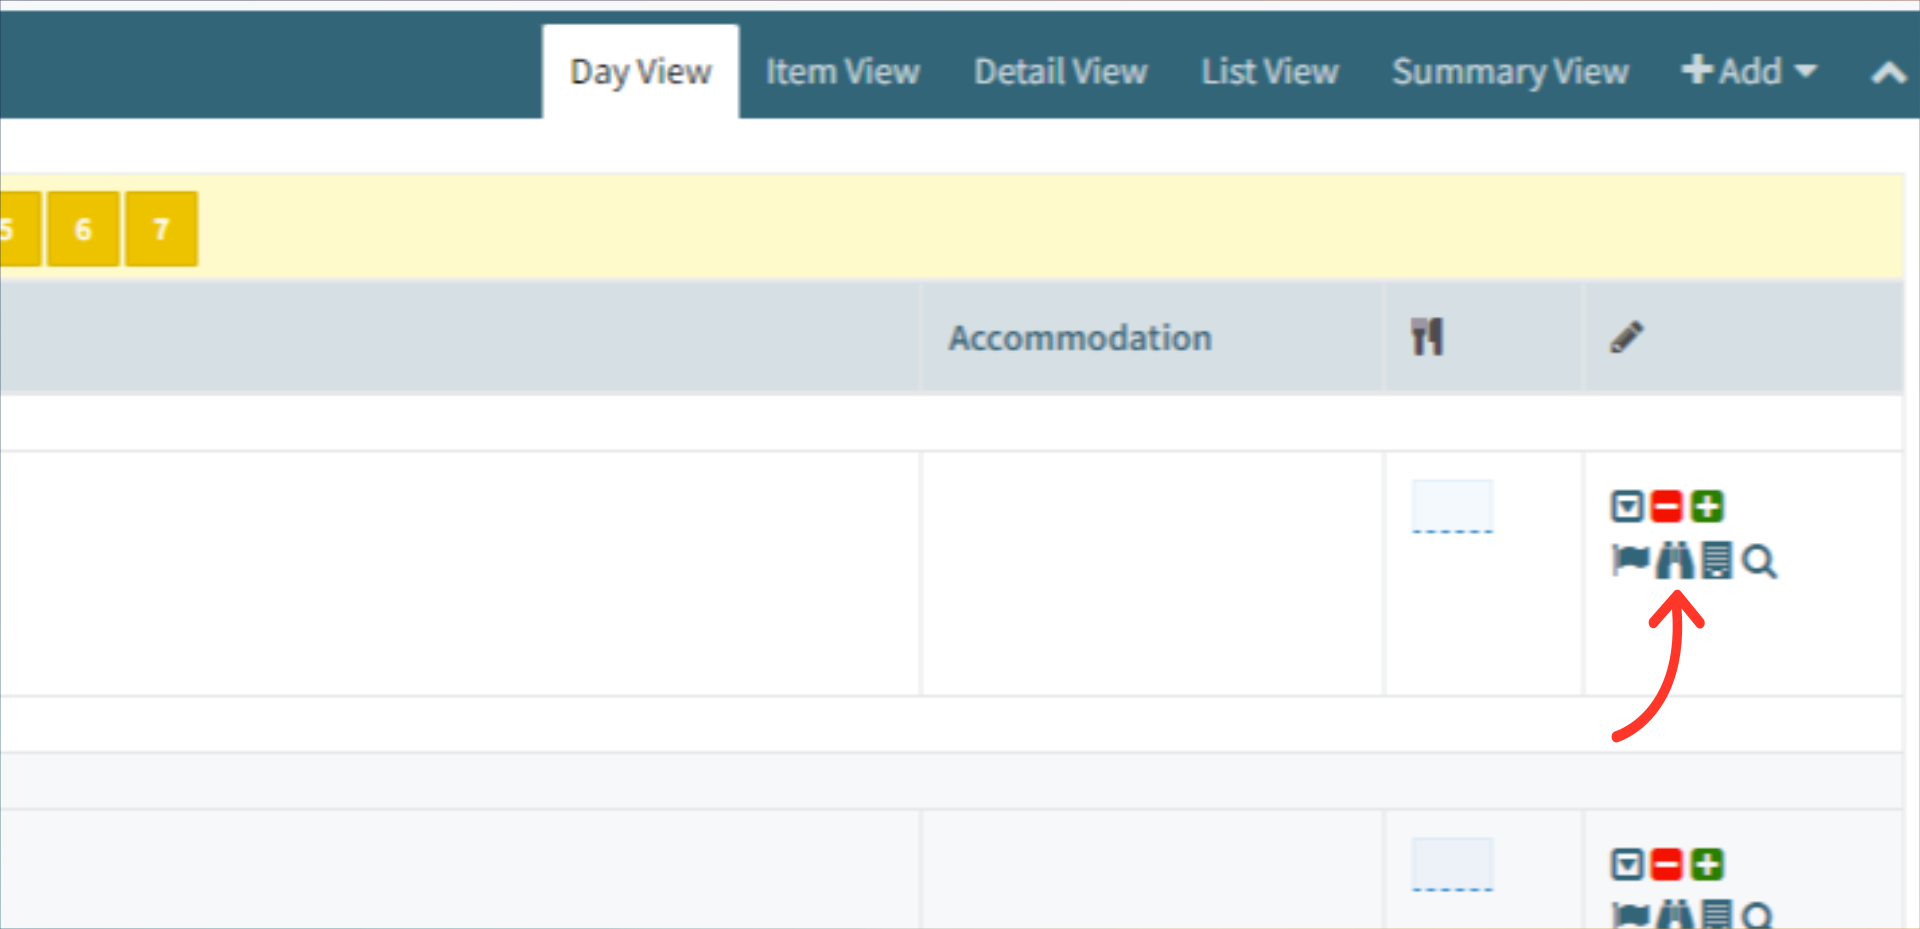
22. Next, lets add a Service to the day by clicking on the binoculars to the far right of that day.
| To Learn More about Adding a Service Click Here! |
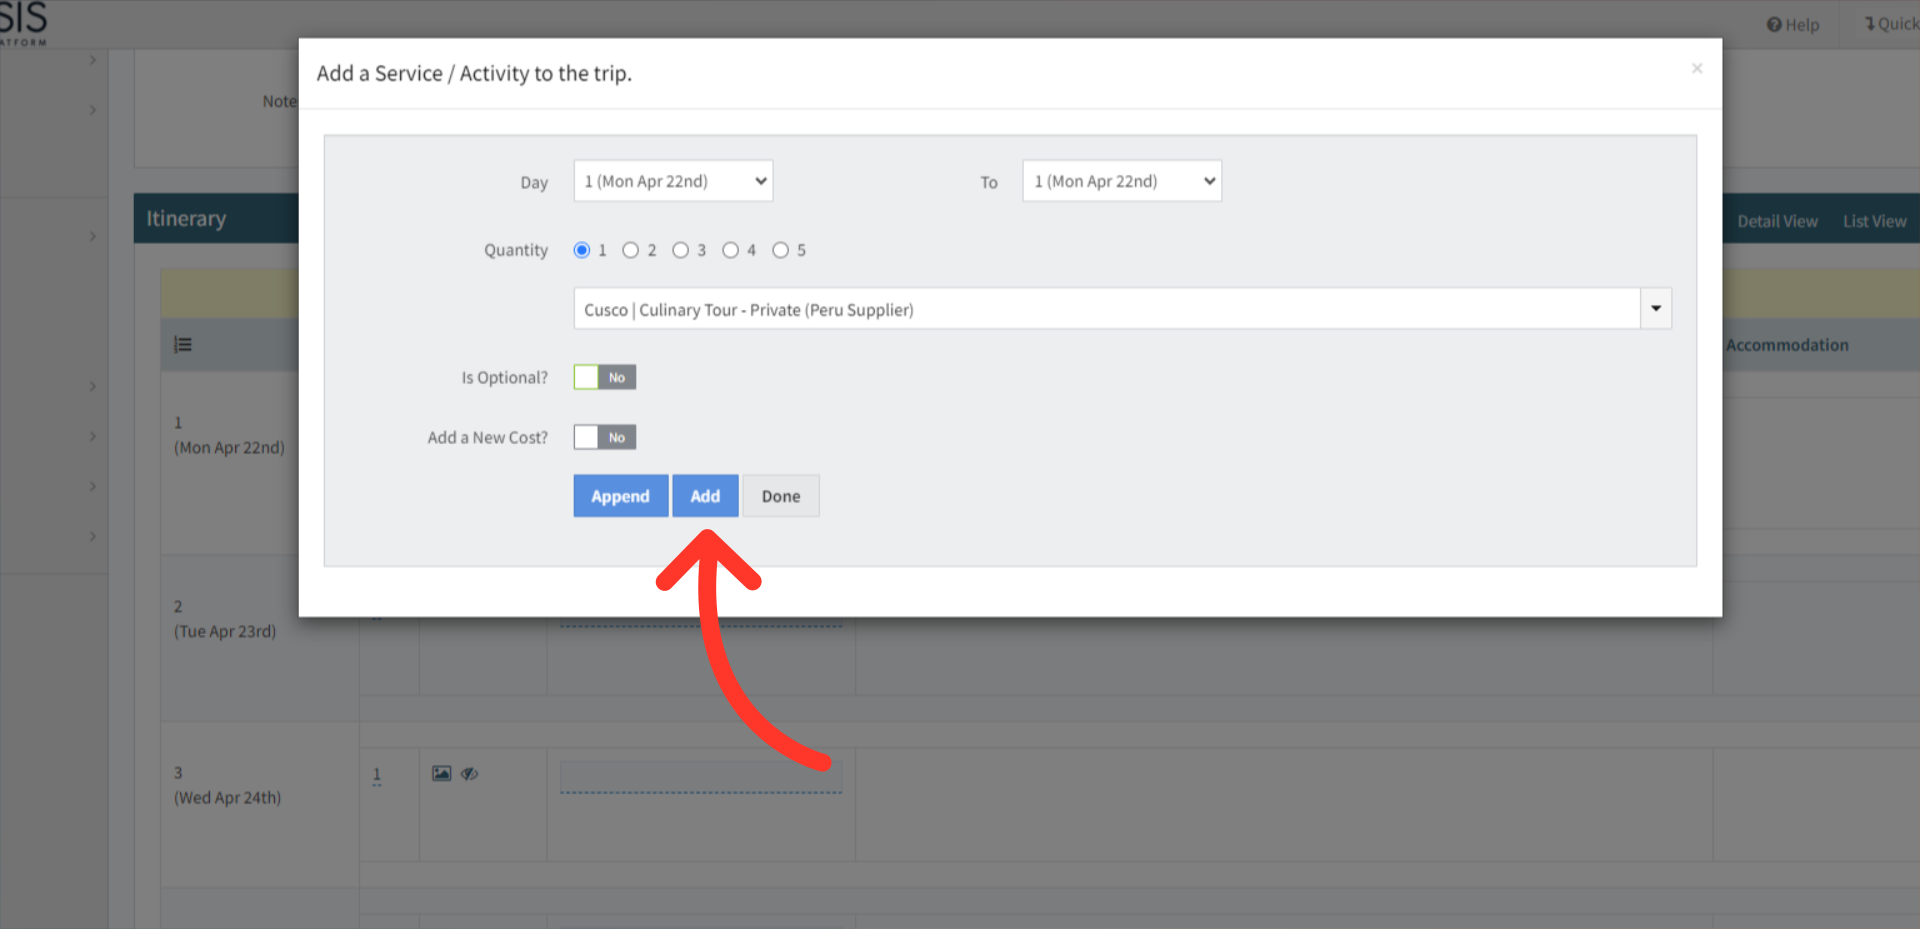
23. In the popup, you can explore the system database to find the desired service or activity. Adjust the duration of days required as well as the quantity needed. You can also choose to make it optional, which will include it on the itinerary as an aggregate option for the specified day.
Adding a New Cost through this popup via the toggle is a convenient way to include a cost for that day item simultaneously. The resulting cost will be linked to the day item, and if deleted, the cost will also be removed. Opting to add a new cost will provide you with further options to customize the cost details. Once everything is set, click the add button to include it on the itinerary.
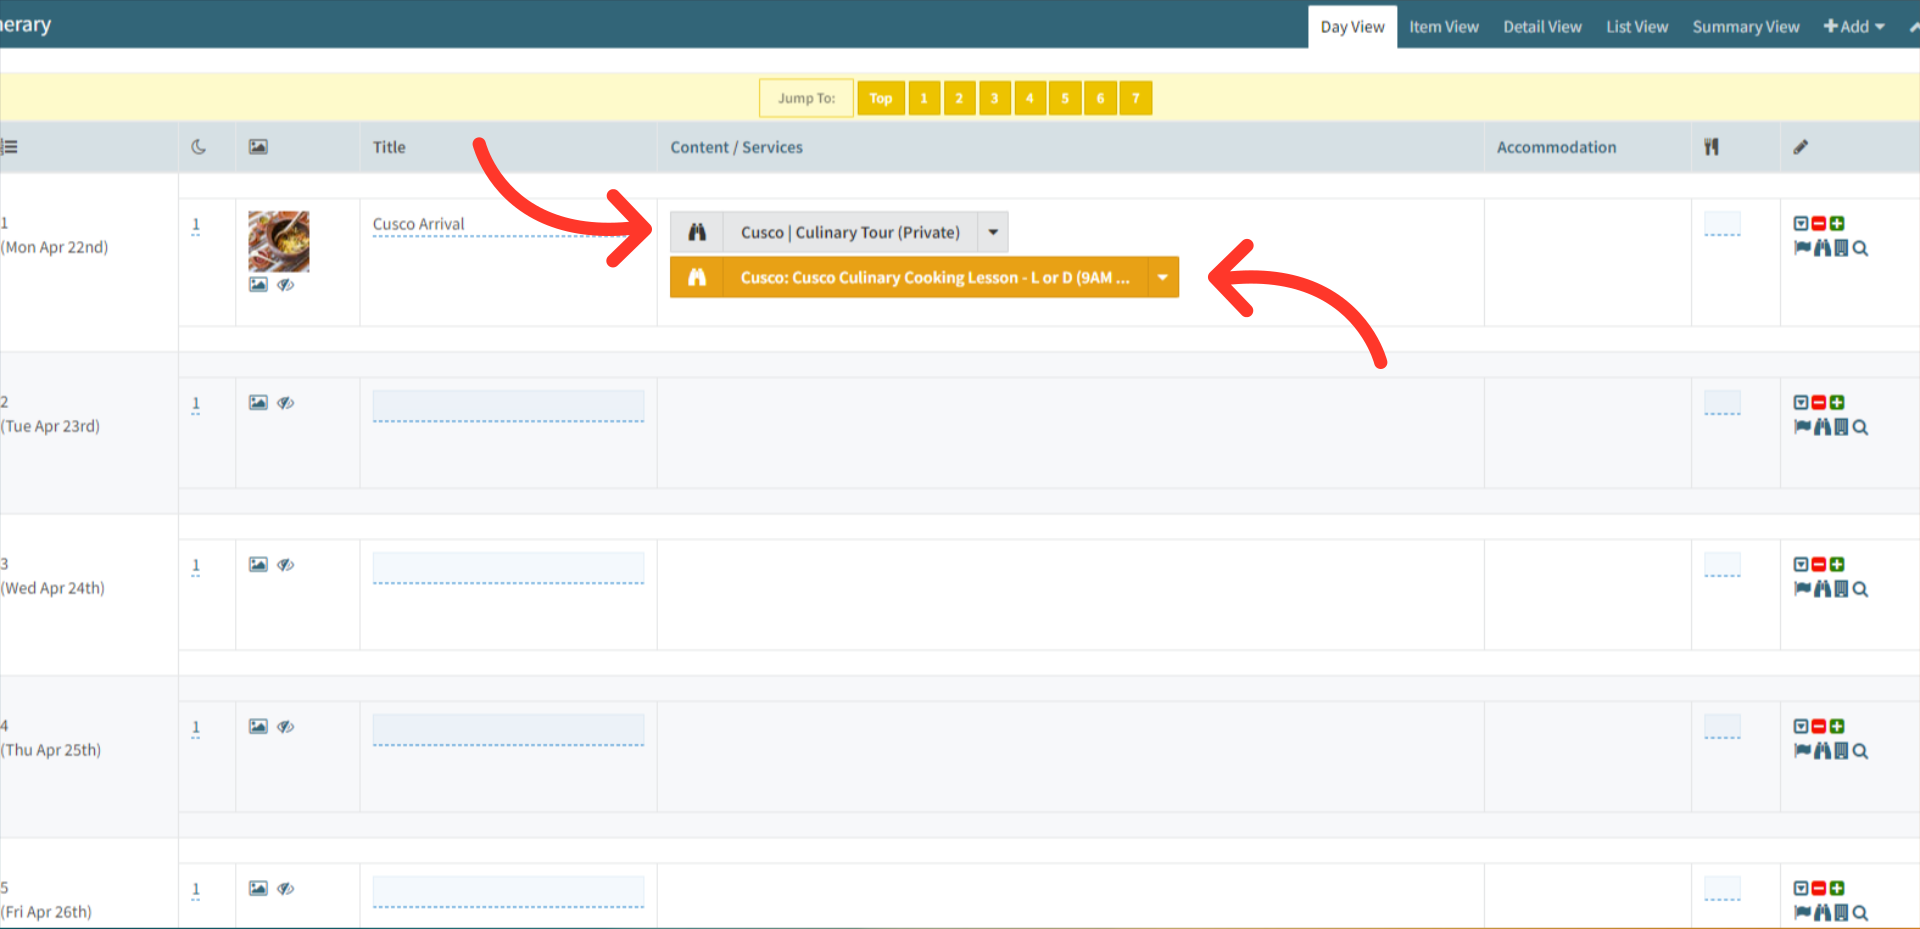
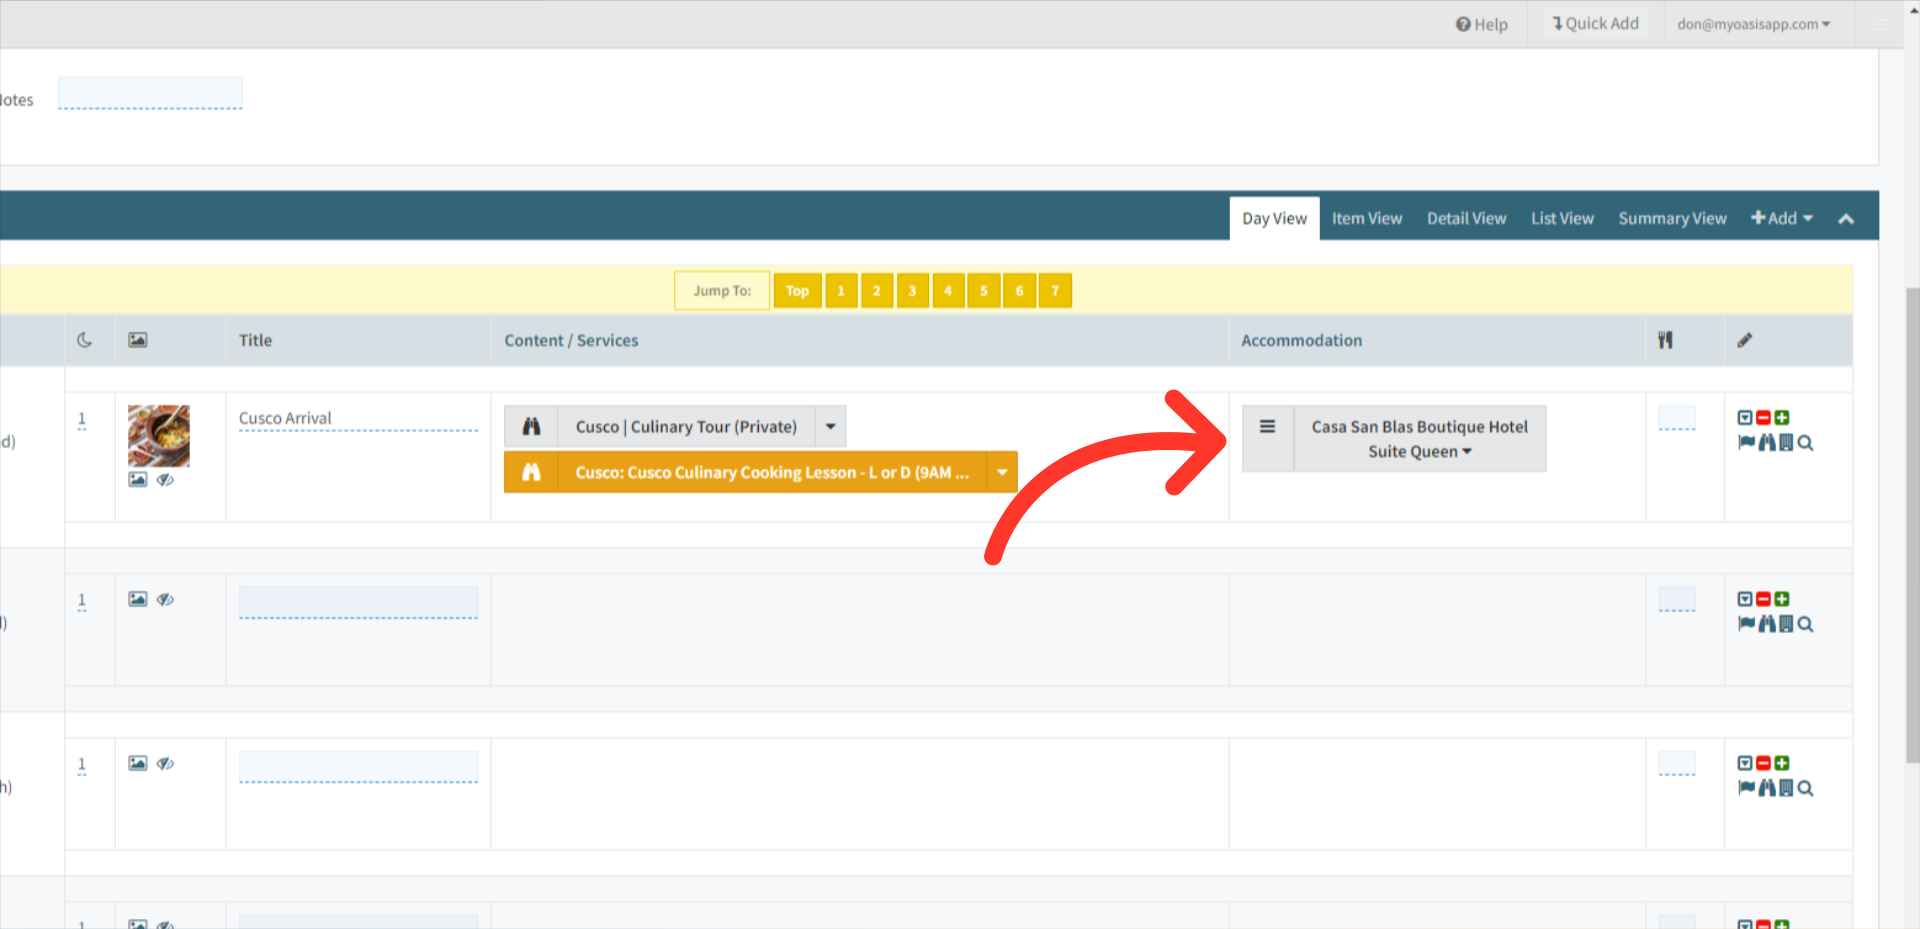
24. Below is an example of a service being added and an example of an optional service in orange.
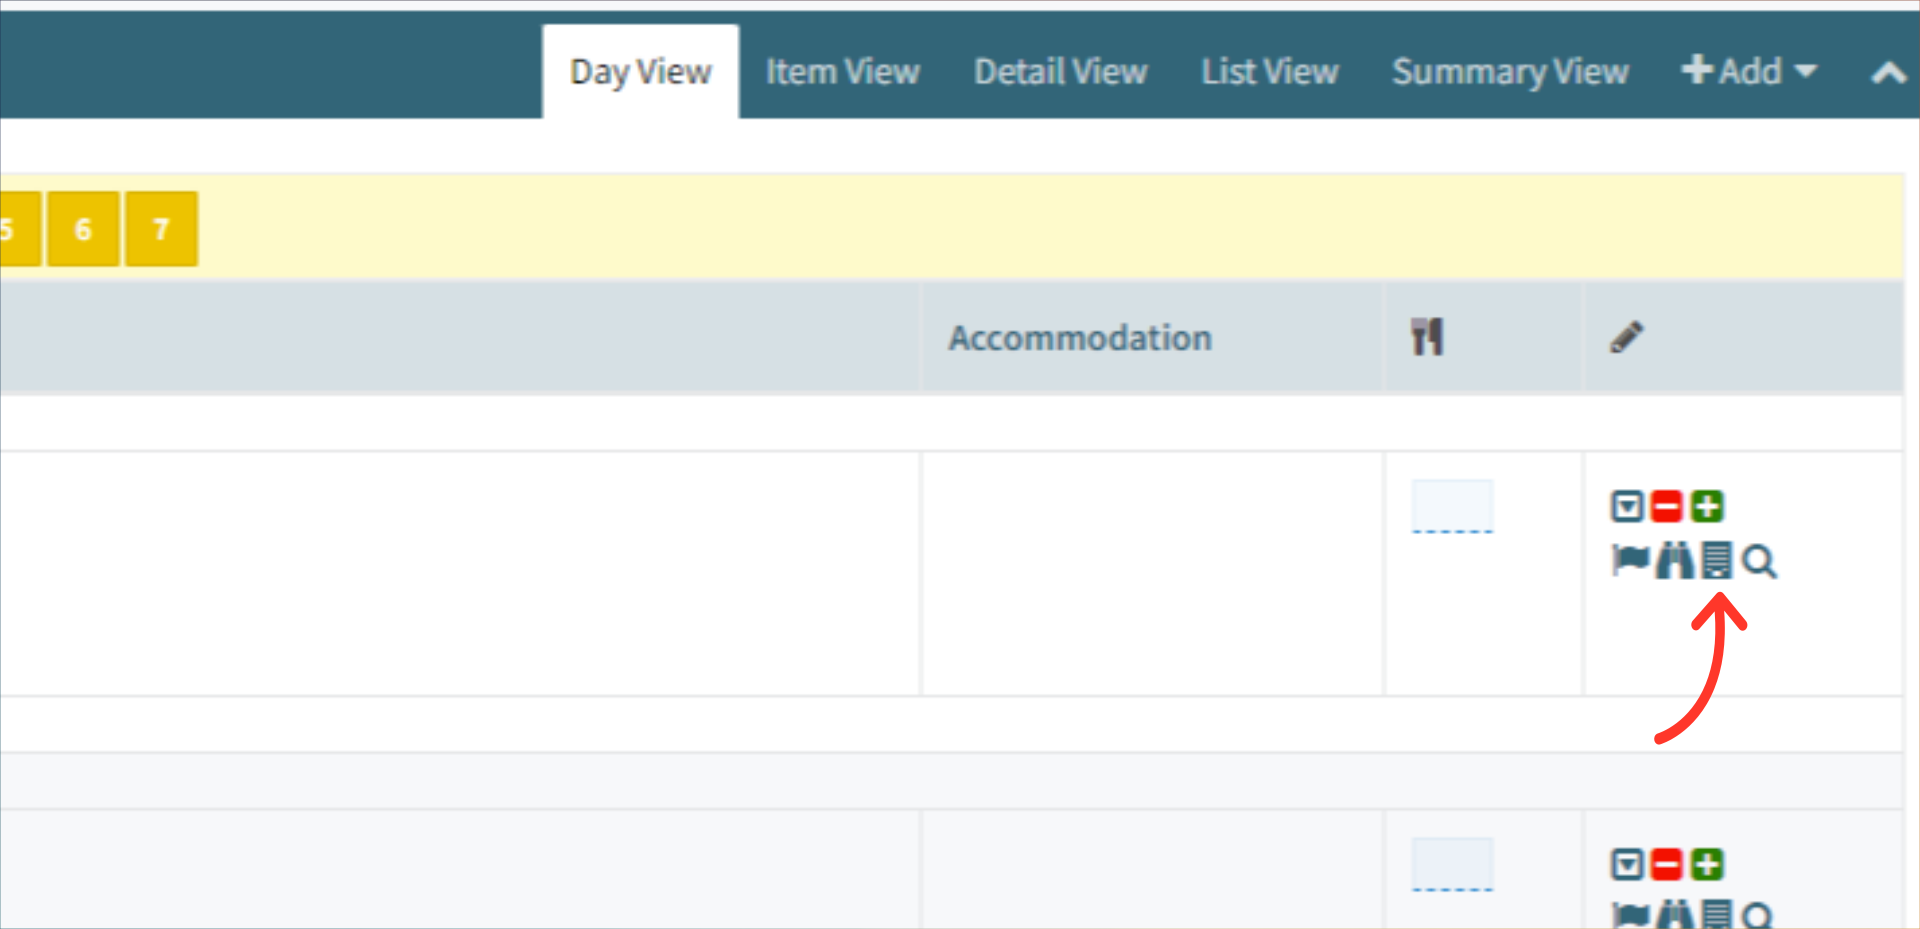
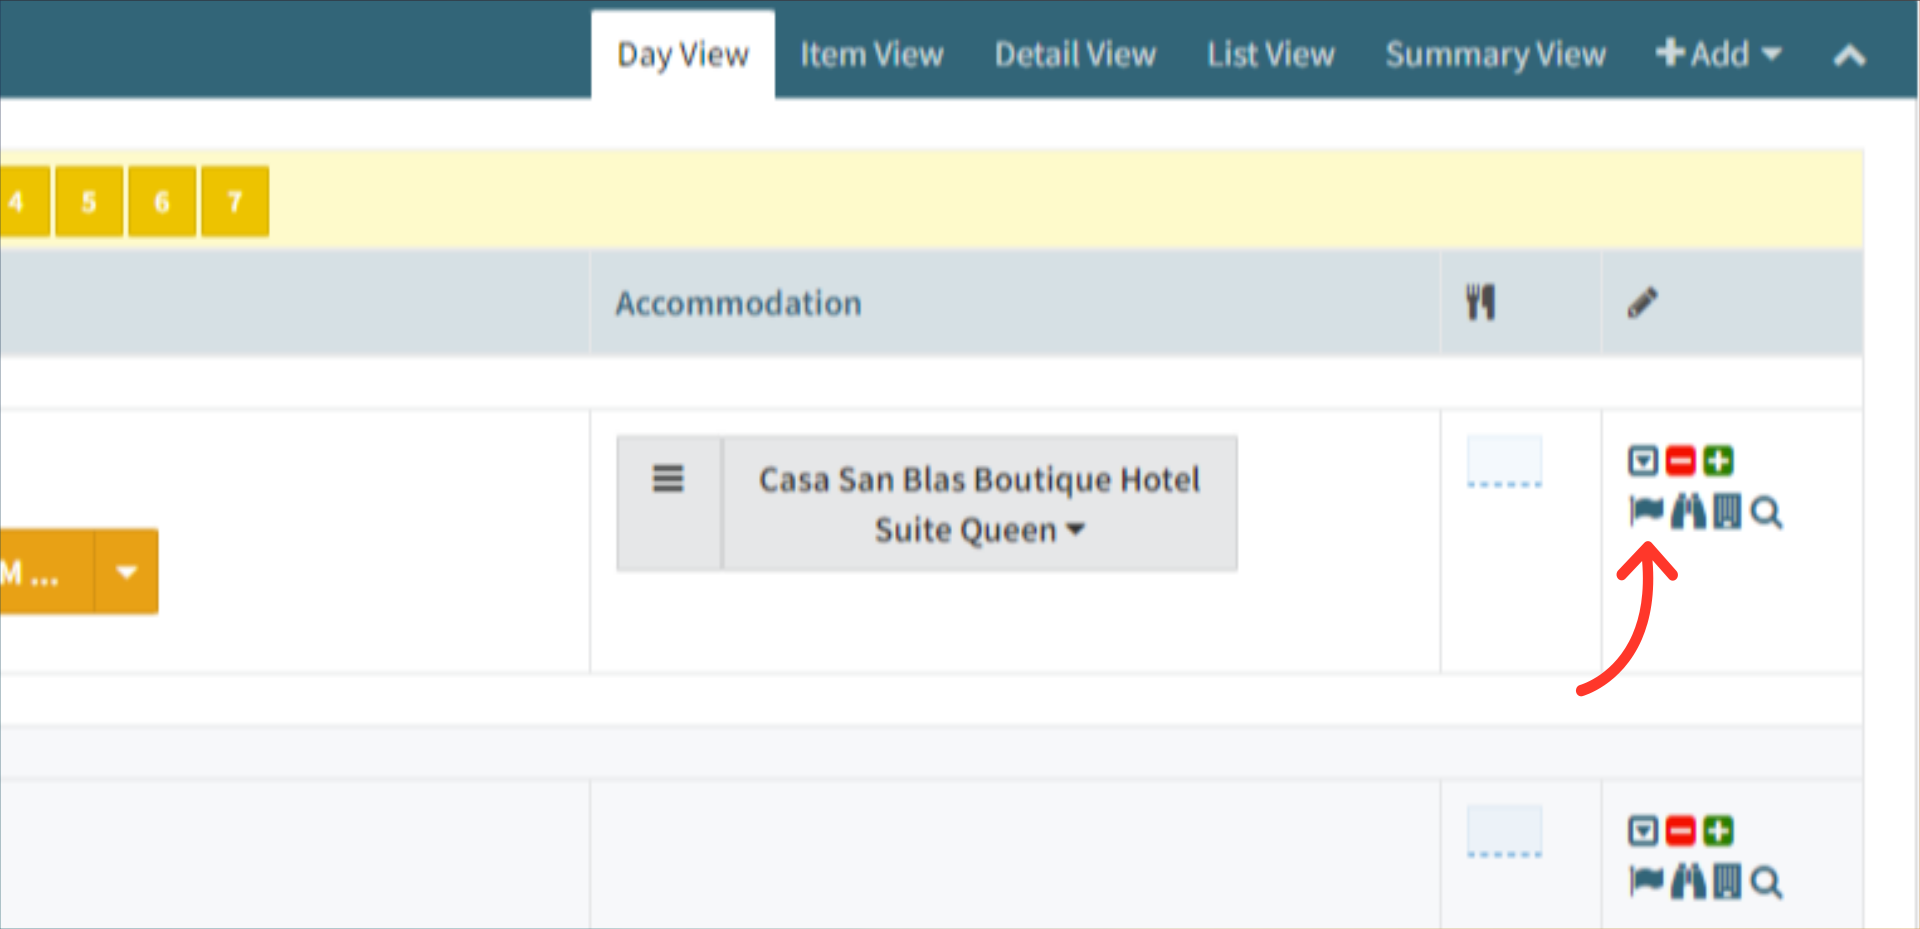
25. The Building icon lets you add a Accommodations to the itinerary.
| To Learn More about Accommodations Click Here! |
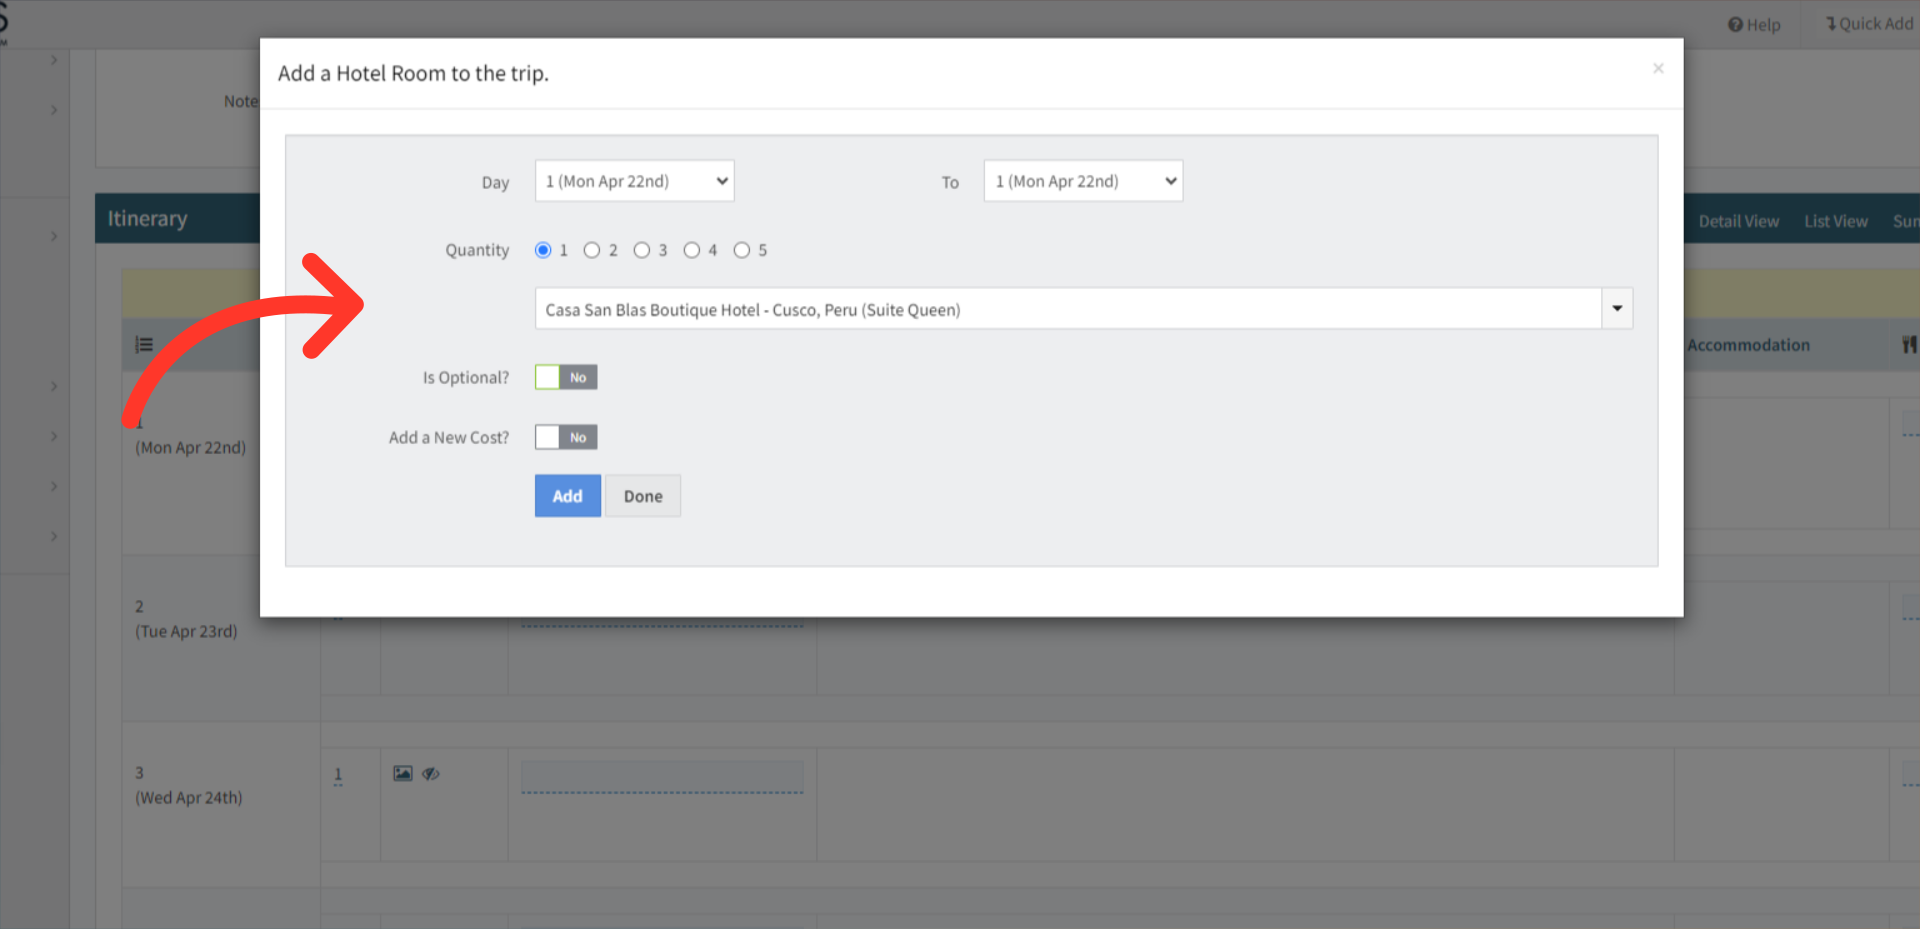
26. In the popup, you'll see the same familiar options, fill in the details and click Add to include this Hotel Stay on the itinerary.
27. Your Accommodations will be added under the Accommodations column.
28. Now, click the Flag icon to add some curated Content to the itinerary.
| To Learn More about Creating Content Click Here! |
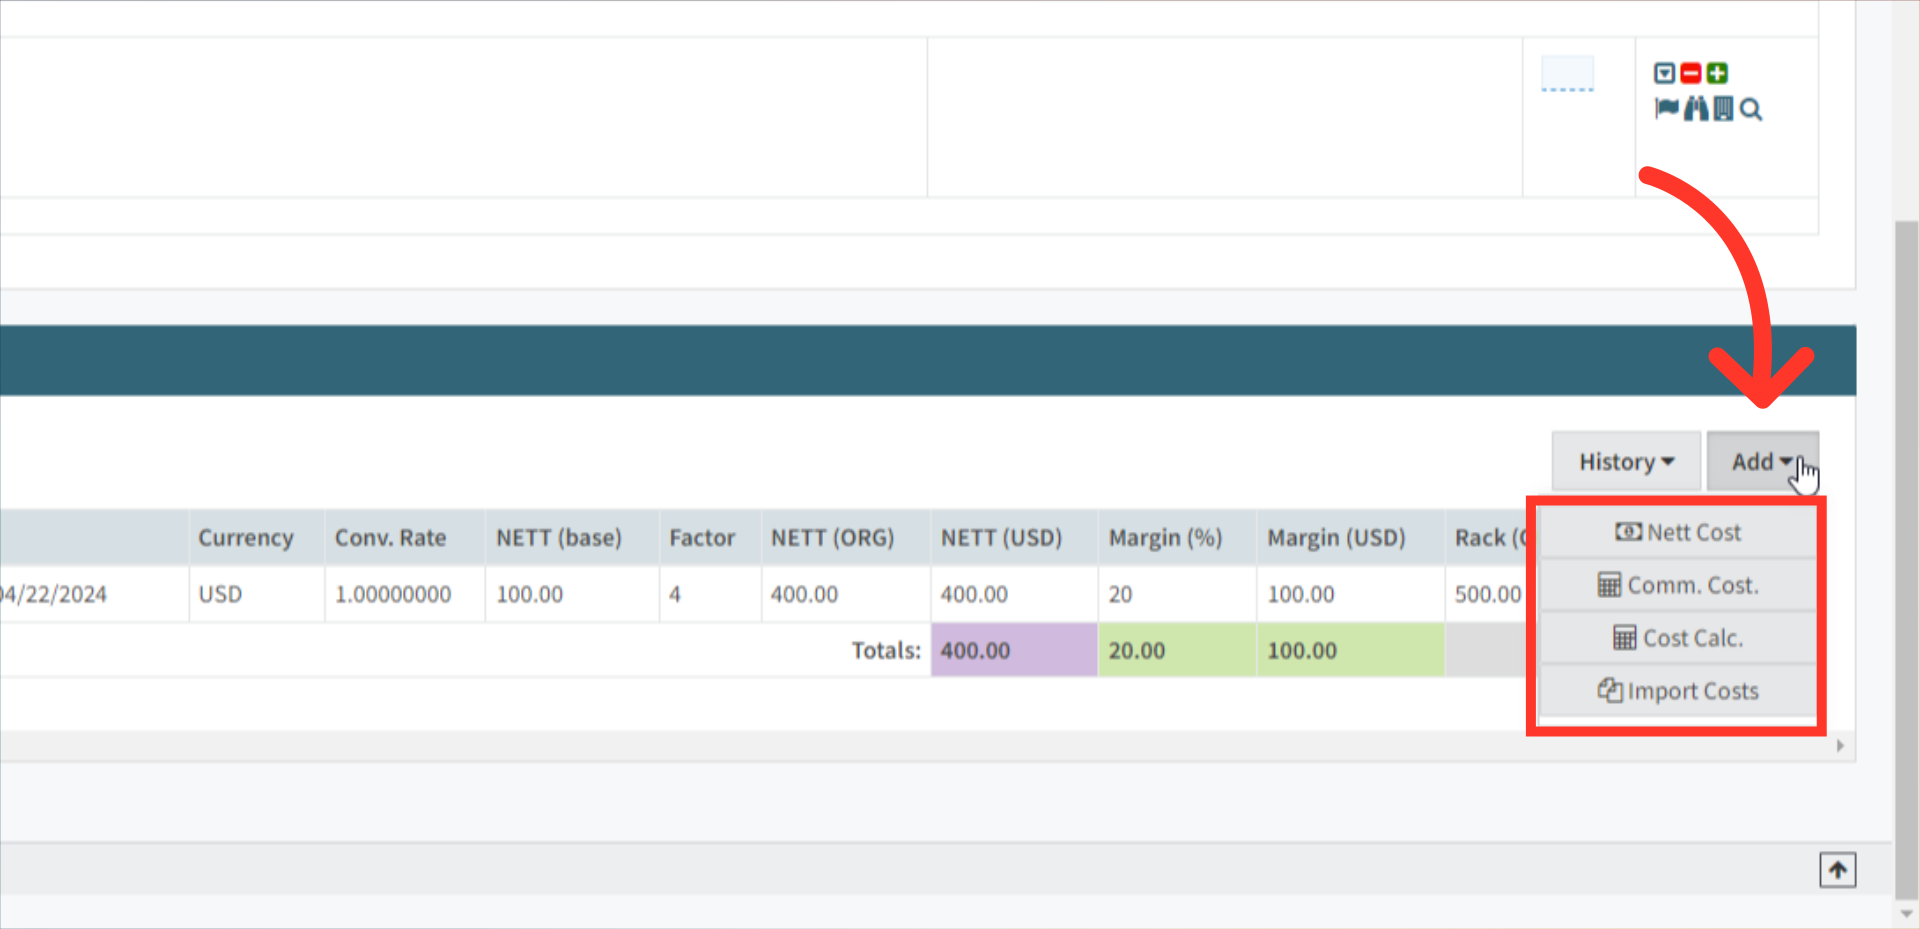
29. Beneath the itinerary, you'll discover the costs linked with the trip. Any costs linked to day items in the itinerary will appear here. Additionally, we provide the option to manually input costs into the itinerary using our convenient calculators under the Add button.
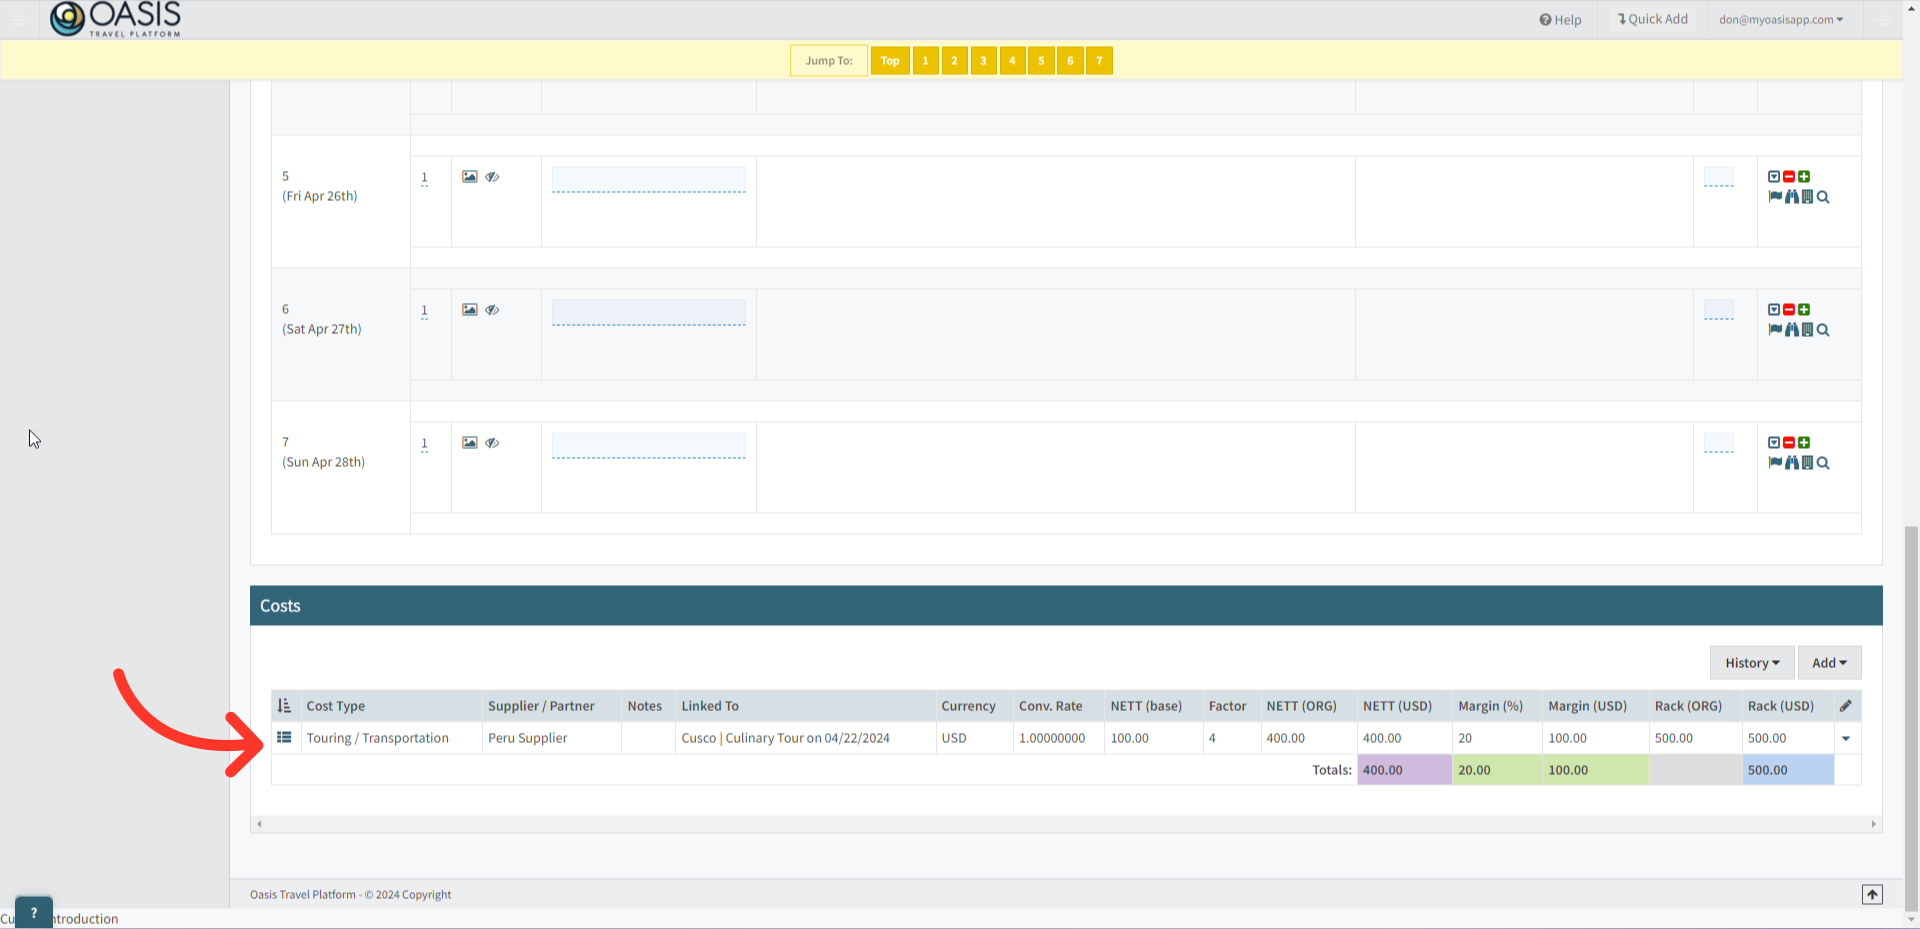
30. You can Add Costs using one of our Calculators or Import Costs from another trip. We have several calculators available: the Nett Cost Calculator, which factors in margin percent and Nett Base; the Commission Cost Calculator; and the Cost Calculator used for existing costs or cost types.
| To Learn More about Calculators Click Here! |